Free/Busy Times via Office Online
To keep updated, I am just starting publishing my free/busy times to Office Online. First of all, register with Office Online, this shouldn’t take that long if you have already a Windows Live account.

Open Outlook and chose the calendar you want to publish by right-clicking it in the task pane.
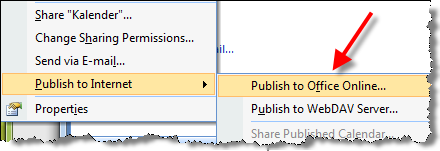
Now select ‘Publish to Internet’ and then ‘Publish to Office Online…’. After doing some registration you can finally choose the options for publishing the calendar.
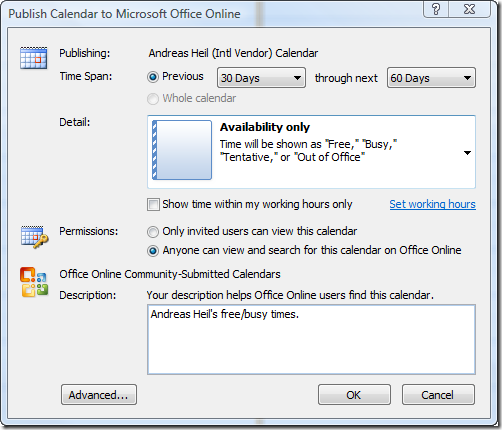
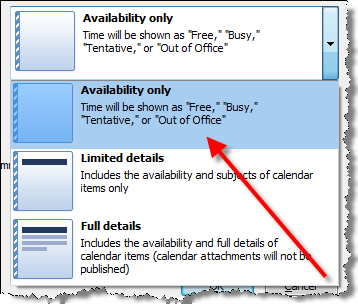
We are going to choose the granularity of details we want to publish. In my case I choose the ‘Availability only’ option.
Then I am going to allow everybody to see these availability times. If you are going to publish more details, you might want to consider to share your calendar only with invited users.

At the end I am going to check the ‘Advanced Options’.
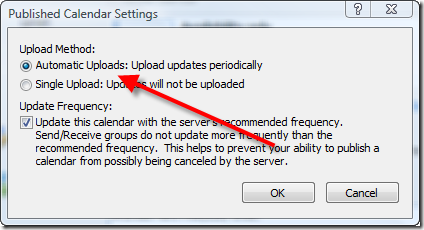
In this case, I am fine with the automatic uploads. After confirming, the initial upload is performed. In the task pane you’ll now find another icon for your calendar indicating that it is shared.

Finally, my free/busy times are now available.

