Visual Studio 2012 Upper Case Menus

I am probably the last person in the .NET community who figured out how to disable the Visual Studio 2012 Metro design upper case menus. I haven’t had a chance to work a lot with Dev11 yet, so I was not bothered too much by the new design. After working a couple of hours with the new IDE, I was quite annoyed by the new upper case menus.

Visual Studio 2012 Upper Case Menus

It seems that Richard Blanks was the first who figured out how to disable the upper case menus in VS 2012, looking nice and capitalized.

Visual Studio 2012 Capitalized Menus

As I love to do things automatically when possible and hate to fiddle with the Registry Editor, I set up the registry key to change in a small script. Just rename it to .reg and double click the file.

Windows Registry Editor Version 5.00
[HKEY_CURRENT_USER\Software\Microsoft\VisualStudio\11.0\General]
"SuppressUppercaseConversion"=dword:1

If you create the file manually, keep mind to save it in ANSI encoding, as Unicode scripts are not merged at all.

Huge Visual Studio Find and Replace Dialogs

Every time I reopend the Find and Replace dialog box (CTRL+H) in Microsoft Visual Studio 2010,  the width of the dialog box grew by several pixels. I was looking through various settings in Visual Studio, however, I haven’t thought of a bug in Visual Studio at all.

Finally, Alex Zeitler pointed me to a hotfix  for this issue. The Knowledge Base entry KB2268081 explains the issue in details. The issue affects the following products:

  • Microsoft Visual Studio 2010 Shell (Integrated)
  • Microsoft Visual Studio 2010 Shell (Isolated)
  • Microsoft Visual Studio 2010 Ultimate
  • Microsoft Visual Studio 2010 Professional

In case you use the Find and Replace dialog quite often, you might download and install the hotfix from the connect site.

Master Pages and XHTML

Today, we encountered a really interesting issue with Visual Studio 2010, ASP.NET and Master Pages. Actually Visual Studio denied the design view for all of the pages within the solution except to the master page.

The page has one or more <asp:Content> controls that do not correspond with <asp:ContentPlaceHolder> controls in the Master Page.

No doubt you would check all the pages as well. After verifying that all pages have been correct, the ID as well as the ConteptPlaceHolderID tags are set correctly, you might see that the issue is till persistent.
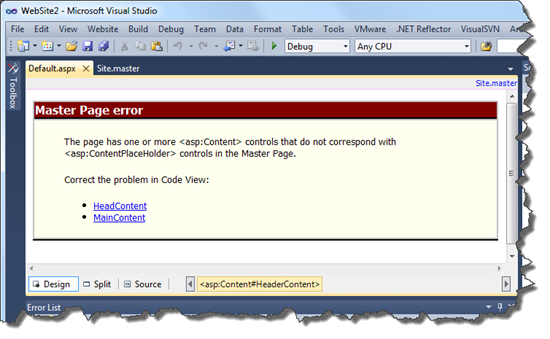
Master Page Error

In this case check your HTML source code of the Master Page. In particular check for all HTML tags with self closing syntax. Referring the W3C Recommendation for XHTML section C.3 there are some tags that should be not used with self closing syntax.

Given an empty instance of an element whose content model is not EMPTY (for example, an empty title or paragraph) do not use the minimized form (e.g. use <p> </p> and not <p />).

Eventually, you now will review again your source code for any XHTML tags in their minimized form.

<html xmlns="http://www.w3.org/1999/xhtml" xml:lang="en">
<head runat="server">
    <title />
    <link href="~/Styles/Site.css" rel="stylesheet" type="text/css" />
    <asp:ContentPlaceHolder ID="HeadContent" runat="server">
    </asp:ContentPlaceHolder>
</head>
...

In the example above change the title tag to

<title></title>

and the issue will be fixed. Even better would be of course to give your page a title.

While most browsers are quite forgiving here, the Visual Studio designer quits his job. Unfortunately, the error displayed is misleading and you might waste some time in reviewing Master Pages and ASP.NET controls that are obviously correct. Whether this is a bug or Visual Studio designer doing the right job and failing just for those tags based on the W3C Recommendation – it does of course not help a lot if Visual Studio does provide a misleading error message to the developer.

ReSharper 5.0 can Visual Studio 2010 Metadata View

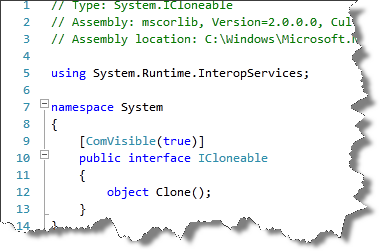
One major drawback of ReSharper 4.5 was the fact if one navigates back to a compiled class, ReSharper always opened the Visual Studio Object Bowser. However, personally I prefer the Metadata View of Visual Studio:
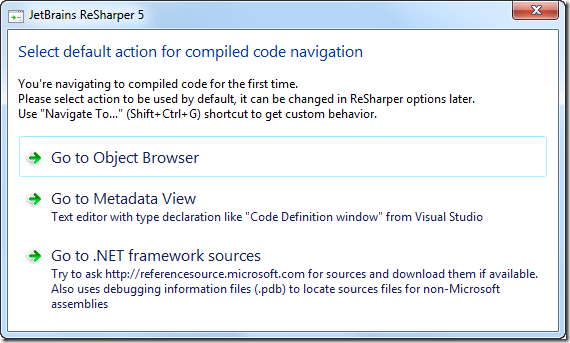
Visual Studio Metadata ViewWith version 5.0, ReSharper (currently available as EAP) comes a major improvement: The first time you navigate to a pre-compiled class, ReSharper offers you to choose your favorite view: Object Browser, Metadata View or directly the .NET framework sources.
JetBrains ReSharper 5.0

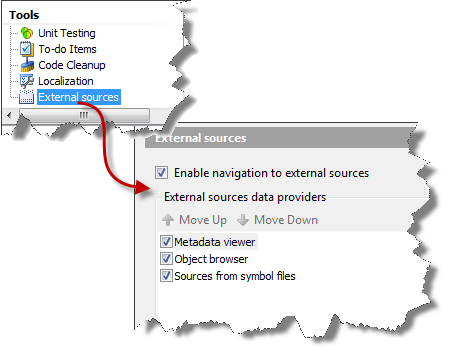
In case your change your mind (or the selected sources are not available) you might define the order for the code navigation within Visual Studio at the ReSharper options from ReSharper / Options… / Tools / External sources:

ReSharper Options: External sources

Visual Studio XAML View

For a while, I am working on a project where I use WPF to its limits. Unfortunately, Visual Studio has its limitations in rendering the stuff we do here.

We started with Visual Studio 2005, without any native support for XAML in Visual Studio doing a lot of the work in Notepad2, using one CTP after another including Visual Studio 2008 Beta 2 up to the final version of Visual Studio 2008. Things became better over time, however, I wished simply to switch off the Design view in in Visual Studio.

Hidden in the Visual Studio settings, there is this switch A hidden jewel for anybody working a lot with the WPF markup language in Visual Studio.

You’ll find it at: Tools / Options… / Text Editor / XAML / Miscellaneous

Open XAML always in XAML view in Visual Studio

How To Order Unit Tests in Visual Studio 2008

Sometimes it is maybe necessary to bring some order into your unit tests in Visual Studio. Indeed, this is not really the idea of unit testing, however it might be necessary for a variety of reasons. Facing this issue, I had to search the MSDN documentation for a while.

I was desperately looking for some syntax like:

[TestMethod(Order = 1)]

However, the only way to bring some order in your tests is, by creating some ordered tests in addition to your unit tests.

To do so, you first create a set of unit tests. In my case, some of the tests should be only executed after other run successfully. Otherwise the result might look like:

Failed Unit Test

Now we create a new test project called Order Test:

Add New Ordered Test

When opening the project you actually can arrange the order of the previously written unit tests:

Arrange an Ordered Test

Running the test then is possible by selecting the test from the Test View window. Your tests will actually only appear as one entry in the list but you will see that all the selected tests run successfully – in the correct order.

Succesfull Ordered Test