Nicely Displayed Tweets

While looking at how to get a tweet from Twitter nicely formatted, I tried all kinds of tools, web sites and tips. In my case, I wanted to put a nice screenshot of the tweet by Alex Yates into my DevOps lecture slides.

Sharing the tweet via e-mail seemed to be a possibility, but it did not look as nice as I expected.

It turned out, that Twitter provides functionality to nicely display Twitter URLs out of the box via https://publish.twitter.com.
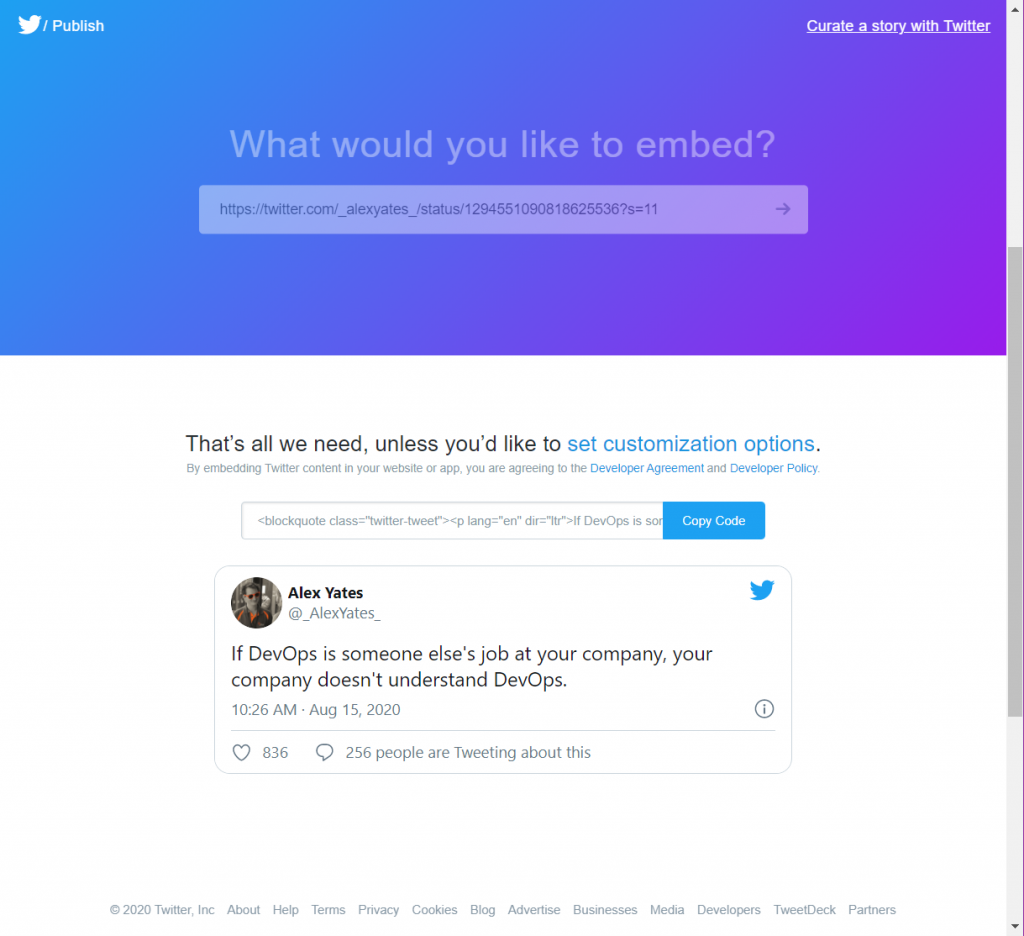
All you have to do is to paste the Twitter link into the text box and everything ios nicely rendered for you.

Link: https://publish.twitter.com/#

Oh Shit, Git!?!

Another gem in terms of Git. This is the source you might look at, once you have completely messed wit your Git repository. It solves the chicken and egg problem all of us know about Git:

Git is hard: screwing up is easy, and figuring out how to fix your mistakes is fucking impossible. Git documentation has this chicken and egg problem where you can’t search for how to get yourself out of a mess, unless you already know the name of the thing you need to know about in order to fix your problem.

Link: https://ohshitgit.com/

How to keep a Docker container alive

To debug a Docker container, I was looking for a way to keep the container up and running to inspect it.

Basically, I wanted to bash into the container to verify some changes I made. After fiddling around for a while, I found a simple way to do so . In my case, the only package installed was bash. Eventually, there are few services you could use to keep the container running. However, you can use simply use tail the following way

ENTRYPOINT ["tail", "-f", "/dev/null"]

in the Dockerfile to keep the container up after ist started.

Animated Icons

As you might know, I subscribed The Noun Project as my ultimate source for icons. I use them for presentations, lectures and sometimes web sites. It’s a lifesaver for me.

Recently I received a newsletter which pointed me to a tutorial on how to create animated icons. It’s quite a good tutorial and if you are in the need to create animated icons this might be something for you. As I am not very gifted with these tools, I just leave it here in case I need it at a point later in time.

Link: https://blog.thenounproject.com/how-to-create-animated-gif-with-icons-a9eb757948b3

Change what Terminal to open in Windows Terminal (Preview)

While using Windows terminal (Preview) for quite some time, I always opened up the Terminal and then opened a second Tab with my WLS instance. Doing this multiple times a day, this ends up in many many unnecessary clicks.

To change the default behaviour open the Settings (can be found at the right drop-down arrow of the Terminal tabs).

This will open up the settings JSON file. Look up for the defaultProfile entry and search for the corresponding GUID (the string behind this setting) in your document.

Change the GUID in the defaultProfile to the one identifying your prefered terminal.

Save it, close the file and save a lot of clicks.

NGINX WordPress Rewrites

After moving my blog to its new domain try-catch-finally.net there was one major issue open: Search engines. Google, Bing, DucDuckGo and whatever have their indices. Eventually, I want to make sure when you hit one of the search results, you will end up with the proper site.

Using NGINX allows you to do this with a few files. Using the location section let you match against path segments and applying a rewrite rule.

The trick is done by the two parameters $1 and $1. While the $1 is the content in the first paratheses, $2 is the rest of the path segment from your request which is in the second paratheses. Once I got this pattern, It was easy to write the below rule.

server {   
  ...   
  location location ~ /(2004|2005|2006|2007|2008|2009|2010|2011|2012|2013|2014|2018|2019|feed|comments|tag|author|category)/(.*) {
    return 301 https://www.hack-the-planet.net/$1/$2;     
  }   
  ... 
}

In addition to just forwarding your request, the client will receive the HTTP status code 301, that way there is a good chance search engines get the information about the change for this particular URL.

Log into dockerized MySQL

From time to time there is the need to log into a containerized MySQL instance. And of course, when this time comes, I have completely forgotten how this works. Consequently, I should write it down. Here you go:

Bash into the running container

docker exec -t -i <container_id> /bin/bash

Usually, you should end up with something like the following:

root@localhost:~# docker exec -t -i 365a8a95c335 /bin/bash
root@365a8a95c335:/#

Log into MySQL

mysql -u “<useranme>” -p

Once again, it should look similar to the following:

root@365a8a95c335:/# mysql -u "wpuser" -p
Enter password:
Welcome to the MySQL monitor.  Commands end with ; or \g. 
Your MySQL connection id is 146
Server version: 5.7.24 MySQL Community Server (GPL)

Copyright (c) 2000, 2018, Oracle and/or its affiliates. All rights reserved

Oracle is a registered trademark of Oracle Corporation and/or its affiliates. Other names may be trademarks of their respective owners

Type 'help;' or '\h' for help. Type '\c' to clear the current input statement

mysql>

Now you should be able to do whatever you want to do with MySQL.

Subtle change the Colors of your Visual Studio Code

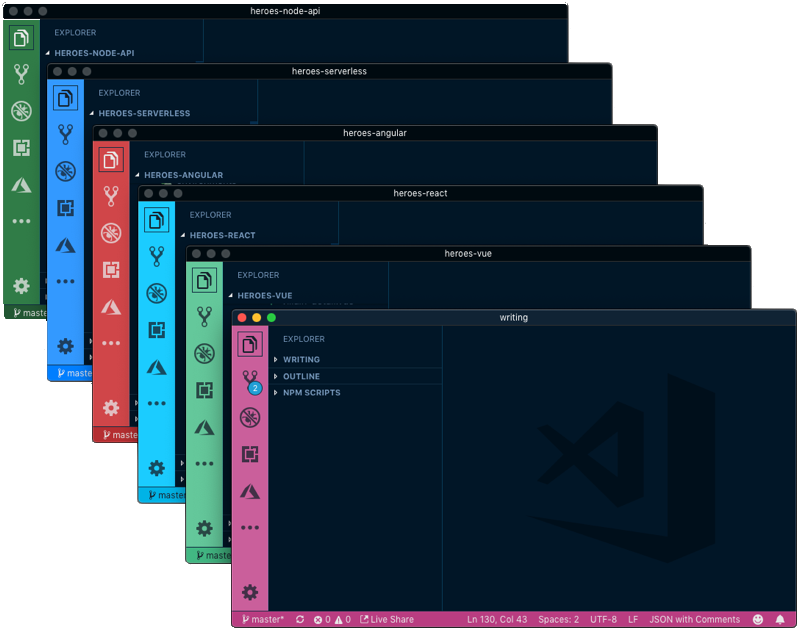
While I was just writing about using different color schemes for multiple VS Code instances, I just learned about a VS Code extension called Peacock by John Papa which does this job for you.

 A Visual Studio Code extension that subtly changes the workspace color of your workspace. Ideal when you have multiple VS Code instances and you want to quickly identify which is which.

I’ll probably give it a try as VS Code is used on my machine meanwhile for almost anything I write.

Using Different Color Themes in VS Code

As Visual Studio Code became my main editor, I often have more than one VS Code window open. This gets confusing after some time. To keep track in which project you are currently working, I thought of using different color themes by project.

As usual, once you know the trick, this is quite easy.
Navigate to File / Preferences / Settings and select the Workspace tab.

The setting for the Color Theme you choose here will be used whenever this particular folder is opened. That way you can easily distinguish between open Visual Studio Code windows.