Veni, Vidi, Vici. Stream on.

I told last post about setting up a streaming project. I usually do this to set myself a deadline. And it worked.

During the last few days, I set up my Twitch account, created a YouTube brand, and started my first live stream. During the first evening, I did set up the Website using Ansible and Docker in my first three hours live stream. I also tried a second stream with my s***y headset and even managed to record it and throw it onto YouTube. I have to apologize for the bad quality, but I am still learning.

http://www.hack-the-planet.tv

I learned a lot about filters and hardware, are still looking for a schedule and how to manage this whole setup. I probably start streaming frequently in September.

For streaming and recording, I decided to use OBS Studio. There are some alternatives out there as well as some variants with various extensions.

I have set up a hardware wish list at Amazon (Hey! Sponsors where you?) as this is an educational and non-commercial project. Altogether it has been a busy week but a huge part of the infrastructure is in place, including a lot of learning but also failing.

Next step: I am starting chatting about the podcast. Maybe this will start soon as well.

Said that there was a major decision I had to make. All content created for and provided by Hack-The-Planet TV will be solely in German. The audience in the first place are students of mine speaking German most of the time. Also, there is a lot of content in English already available, Much more than German. But I see and feel the need for content in their first language.

Hack-The-Planet TV – My Streaming Side Project

I have struggled with this idea for a while. Meanwhile, I live in the countryside. I have to drive 45 minutes to the next city. It’s quite a distance. And I have a toddler. Two, there will be soon. Consequently, it is not that easy to quickly join a Meetup or User Group meeting in the evening. And I miss talking to other techies. Kids change you live. Especially if you are a nerd, geek, and techie.

In addition, I will start a new position in September 2019 as a professor for Software Engineering. I will cover all the hot shit topics like DevOps, Cloud Computing, maybe some Big Data stuff and basically everything that will come along in the future.

Teaching at university, however, is old school. Platforms like Coursera and others are nothing else. It’s just old school (but online, yeah). So I have a plan. I will try to make things different. I will meet my students (and probably a lot of other folks) in the world I grew up and still live. Here. Online.

Therefore, all the above points led me to a new project called Hack-The-Planet TV.

What do I do? Rising Geeks! Teaching computer science and software engineering by day, I will do the fun parts not covered in the official curriculum by night.

We’ll do Let’s Plays, Let’s Codes and just talk. I teach in German, and so the overall Project will be in German. Sorry to you all out there as you’ll miss the best parts.

While this is going to be a challenging project I want to cover a couple of things:

  • Streaming: I’just started my Twitch channel HackThePlanetTV.
    I’ll be working on a schedule. I plan to stream once a week. I have to figure out a schedule. Until then I will rather stream occasionally. Apologize for the short notice in the near future.
  • Let’s Code: Not only but also in the streams, I want to cover typical problems you are taught at university. I’ll do live codings with whatever technology and other stuff – record these and put the videos online.
  • Open Source: I’ll try to put as much as possible everything OSS. Therefore, everything will end up on GitHub.
  • Podcasts: I commute a lot. I enjoy listening to podcasts. I’ll try to set something up where we (currently looking for to with whom I’ll team up) talk about all the geeky stuff creating an own podcast.
  • www.hack-the-planet.tv: Of course, I will try to host as much content as possible by myself. Therefore, during my first stream, I have set up my own web presence for the project: www.Hack-The-Planet.tv

And now you probably think: Why the heck is he doing this? I used to be a developer, architect, I run my own business, I was a team led and spend the last five years as a product manager. I got bored with engineering stuff. In was challenged by a higher manager, if I would do my job if it would not be necessary to earn money. That’s like living in the Star Trek universe. So I quit my job. I don’t think he is aware of what he caused by his question. I went to university to teach. I started to teach the kids to get well-paid developers. And I want to do the fun stuff.

RFC Quick Access

To follow best practices, understand and learn new de-facto standards, I read and refer a lot RFCs (Requests for Comments). Luckily, the IETF provides an endless list of RFCs to do so.

If often need quick look into these RFCs while being in an editor or at a console windows. To avoid switching from the keyboard and losing focus, I use a small batch file called rfc.bat to gain access to RFCs very quickly.

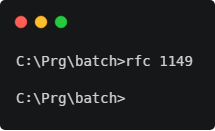
rfc batch file call on cmd.exe

The batch script simply calles the IETF RFC URL with the RFC number as parameter.

@echo off
start https://tools.ietf.org/html/rfc%1

Where ever the batch files lives, make sure the directory is in your path. I use a folder called c:\Prg\batch which is synchronized over all my computers.

I have adapted this approach to a variety of manual tasks to open files which live on a dedicated place. E.g. I use a much more sophisticated script to open Visio diagrams based on process numbers from our company sharepoint to gain quick access instead of maneuvering through a bunch of websites. These are more than 500 documents named based on a alphanumeric pattern, so this way makes it much more easy to find and open the documents.

Windows 10 PowerToys

I loved PowerToys for Windows 95! Now they are back. To be found on GitHub. Available summer 2019.

PowerToys is a set of utilities for power users to tune and streamline their Windows experience for greater productivity.
Inspired by the Windows 95 era PowerToys project, this reboot provides power users with ways to squeeze more efficiency out of the Windows 10 shell and customize it for individual workflows. A great overview of the Windows 95 PowerToys can be found here.
The first preview of these utilities and corresponding source code will be released Summer 2019.

Link: https://github.com/Microsoft/PowerToys

I do not want to see this web content on Yosemite

For a couple of weeks I now this really annoying message during the start up  of my Yosemite installation.

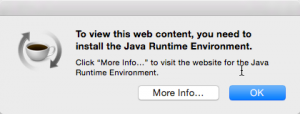
To view this web content, you need to install the Java Runtime Environment.

If I do follow the instructions of the pop up, I usually land on the Java site.

To view this web content, you need to install the Java Runtime Environment.As I develop on a regular base, I have the latest version of Java already installed (right no it should be version 8u25). Therefore, nothing to do.

I case you thought of installing Apple’s Java version for Mac. That’s  IMHO not the way to solve the issue. You might cure the symptoms, however, you will not fix the root cause for this issue.

To get rid of the message, you need the find the root cause. In my case it was the attempt to try Facebook’s video chat some weeks ago. That was the only one installation I performed since I receive this message. Even though, I disabled the add-on in Firefeox, the message kept showing at start up.

To get finally rid of the message head straight to the terminal and enter

launchctl list

In case you wonder that launchctl does, check the manpage which says

launchctl interfaces with launchd to load, unload daemons/agents and generally control launchd. launchctl supports taking subcommands on the command line, interactively or even redirected from standard input. These commands can be stored in $HOME/.launchd.conf or /etc/launchd.conf to be read at the time launchd starts.

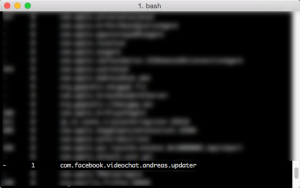
Anyway, you shot not get a list of off all jobs loaded into launchd. There ckeck if you can find com.facebook.videochat.{username}.updater in this list. Wondering what this is? It’s some kind of Facebook-collects-your-data thing. Honestly, I don’t want to know much more about what it does, I just want to get rid of it.

com.facebook.videochat updater

Check out

ls ~/Library/LaunchAgents/ | grep facebook

You should get something like com.facebook.videochat.{username}.plist.
Now run

launchctl unload ~/Library/LaunchAgents/com.facebook.videochat.{username}.plist

followed by

launchctl remove ~/Library/LaunchAgents/com.facebook.videochat.{username}.plist

You might want to run the following command instead

launchctl remove com.facebook.videochat.{username}.updater

You now can delete the property list file

rm ~/Library/LaunchAgents/com.facebook.videochat.{username}.plist

Now check for the FacebookUpdate application  via

ls ~/Library/Internet\ Plug-Ins/ | grep Facebook

Again, you should fine something like FacebookVideoCalling.bundle. Send it to /dev/null via

rm ~/Library/Internet\ Plug-Ins/FacebookVideoCalling.bundle

Now there still something to get rid of by calling

rm -R ~/Library/Application\ Support/Facebook/

Et voiá, your are done. The cause for the message should be gone by now.

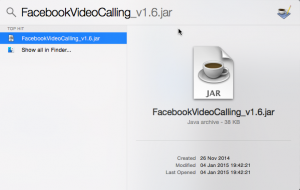
To get rid of the JAR file itself use Spotlight to looking for FacebookVideoCalling. You should find something like FacebookVideoCalling_v1.6.jar. Use Finder then to get rid of it.

Finding FacebookVideoCalling_v1.6.jar That is, by the way, the only thing Facebook suggest to uninstall the videochat. Not only, the sort of infect you with the above updater, they also do not provide useful information for uninstalling the stuff.

The fact, Facebook’s add-on installed this nasty updater is quite annoying. Adding a job to the launchd for an Firefox add-on is quite questionable. Even more annoying that this one slipped through the cracks.

Time to Switch off SSLv3

You probably have heard of the SSL 3.0 vulnerability aka Poodle. So if you haven’t or if you have and haven’t done anything about it, it’s definitely time to switch it off.

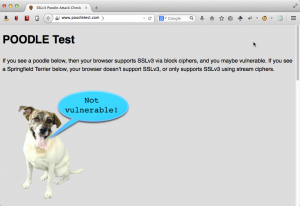
I simply went though my browsers and turned it of, as nowadays it should not be used anymore. To check if your browser is vulnerable, just check out the Poddle Test. If it does look like below, follow the instructions to make it look different.

Poodle TestFirefox

In Firefox you simply type in

about:config

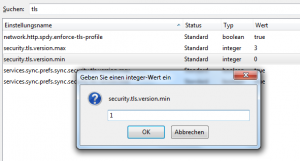
in the address bar of the browser. In the configurations settings you now need to set the value for security.tls.version.min to 1.

Firefox TLS 1Once done, you should be safe, I was told. However, using Firefox ESR 31.1.1, the Poodle Test above still indicates vulnerability.

However, with version 32.0.3 on Mac OS X, setting the minimum TLS version works as a charme.

Poodle TestInternet Explorer

For IE, you should check out Microsoft Security Advisory 3009008 giving a workaround how to turn SSL 3.0 off.

Tools / Internet Options / Advanced got ot the Security category and uncheck Use SSL 3.0 and check Use TLS 1.0, Use TLS 1.1, and Use TLS 1.2.

IE TLS SettingsAgain this should at least give you the feeling of security.

Do not forget about your Crosscable when updating an EZControl XS1

No SEO friendly title in my mind, there was nothing better to describe tonight’s uproar while upgrading some part of my home automation environment.

I don’t always change a running system. But when I do, I break it for sure. And of course, when I change something, I always change literally everything at once.

While following some rules strictly during my work day, such as

  • never change a running system ,
  • change one thing at a time and
  • don’t use beta software in a production environment

I definitely forget about those rules once I am at home. Therefore, I fiddle around with my home WiFi for days, upgrading everything to IEEE 802.11n including a new full duplex repeater and new access points with exotic chipsets requiring very specific build of DD-WRT.

Still debugging slow pings, lags and randomly missing segments of my network, I also decided to upgrade my EZControl XS1 to the very latest available (beta) firmware.

Once I shut down the device in its bootloader mode, and tried to uploaded the latest firmware (via browser), the HTTP request failed and every single browser on any OS told me the page wasn’t able to be displayed. Once back to the bootloader, it told me the uploaded firmware check failed. Hitting the browsers refresh button did not help a lot either. That’s the way how you brick a $300 gadget in seconds like a boss.

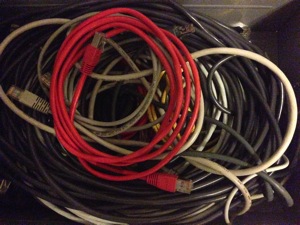
Crossover CableAs anybody would do in such a moment, I dug into my box with long forgotten network cables and picked the very only crossover cable probably exiting within the range of two hours driving. Hail to me, still owning one.

No kidding, most of todays kids won’t even know such a thing did exist. Actually, it’s the sort of cable one used long time before wireless. Before the age of switches, routers and hubs at a time when one tried to connect to machines via ethernet directly.

Connected to the XS1 via the crossover cable, there is absolutely no problem uploading the firmware. When performing the same operation via wireless, there goes something wrong in layer 2 or 3 or maybe 4 – or not. We eventually will never know.
Next time you are going to upgrade the firmware of any device via network, keep your crosscable in reach, you are probably going to need it.
Next time, I won’t change a running system, always change one thing at a time and I will never use betas in production environment… I don’t think so.

openHAB EZControl Integration

For quite a time, I monitored the openHAB project. Eventually, I found some time to test it out and tried to set up some of my existing home automation hardware with openHAB.

Therefore, I decided to set up my EZControl XS1 as a very first testbed.

Learning it the Hard Way

Before digging into the details, I’d like to share some of my experience during my very first hours with openHAB.

First of all, the contributors (currently counting 38) have done a great job in documenting the project. Installation and configuration does work quite well. The same for the basic setup of the development environment (e.g. in the case you want to implement an own binding).

Unfortunately, there are many details you need to know to get the system up and running, not being offered at a glance. You have to dig into groups, the wiki, demo files and perform a lot of trying, experience a lot of frustrating errors. Once you figured out how it works, it is not hard to remember. Done once, some of the issues are that simple, that it is clear why they are not mentioned in the wiki at all. Unfortunately, if you haven’t dealt with openHAB before, you have to learn it the hard way.

Not to forget, here’s a list of sources you definitely need to check in case you stuck with your very first setup:

Definitely, do not miss the last one. Many of your questions will be answered in the examples wiki, though. Still, some details might be missing, but that’s the place to check first.

Said that, there’s no critics about the documentation. It’s great, you just see it’s written by those who implemented it. And as such, one sometimes forgets about the trivial bits and bytes one need to know to start.

Setting up the EZControl XS1

Most devices I run on my EZControl are sensors from the ELV FHZ 1×00 System and intertechno wireless receivers.

For my convenience, I uploaded the configuration app to my internal web server though.
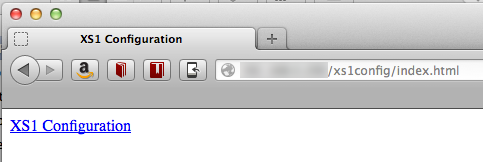
XS1 Setup

For now, I am only interested in the sensors available at the sensors tab.
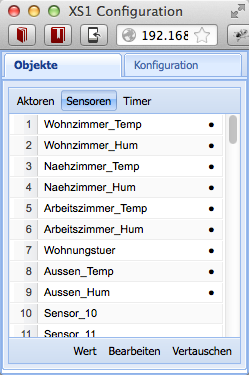
Sensors

Iwanted to be independent from the data structure to set up the XS1 with openHAB. Therefore, the only thing you need to know, is how you named the sensors, though.

Switches

Before starting, make sure the HTTP binding is installed as it is used both, for switches as well as for sensors.

To address switches, you can use the REST interface of the XS and address the switches directly, you simply need to know the number of the switch being used within the query parameters such as number=2 within your *.items configuration file..

Switch Switch_Balcony_gBalcony "Balkon" (gBalcony) {http=">[ON:GET:http://192.168.0.242/control?cmd=set_state_actuator&number=2&function=1] >[OFF:GET:http://192.168.0.242/control?cmd=set_state_actuator&number=2&function=2]" }

Sensors

Sensors can be fetched from the ES1 using HTTP binding as well. Therefore, I pick up the XML output from the ESZ, in my case provided at http://192.168.0.242/xml.
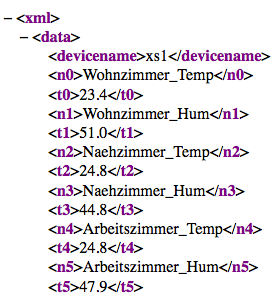
XS1 XML

To pick a corresponding value of a sensor, I’ve created a XSL transformation

<?xml version="1.0" encoding="UTF-8" standalone="no"?>
<xsl:stylesheet xmlns:xsl="http://www.w3.org/1999/XSL/Transform" version="1.0">
    <xsl:output indent="yes" method="xml" encoding="UTF-8" omit-xml-declaration="yes"/>
    <xsl:template match="/">
        <xsl:value-of select="xml/data/*[text()='Arbeitszimmer_Temp']/following-sibling::node()"/>
    </xsl:template>
</xsl:stylesheet>

The XSL is quite simple, picking up he value from the next node after the node with the given sensor name. That way, structural changes in the XS1 setup or even a replacement of a sensor do not affect the openHAB configuration.

Create a XSL for each sensor value, you plan to use within openHAB and place them into the transform folder under configurations in the openHAB folder structure.

XSLT Transformations

Again in the *.items configuration file, using the HTTP binding, I pick up the XML for each node and apply the transformation provided, resulting in a single value.

Number Temp_gOffice "Temperatur [%.1f °C]" (gOffice) { http="%lt;[http://192.168.0.242/xml:10000:XSLT(Arbeitszimmer_Temp.xsl)]"}
Number Hum_gOffice "Feuchtigkeit [%.1f %%]" (gOffice) { http="<[http://192.168.0.242/xml:10000:XSLT(Arbeitszimmer_Hum.xsl)]"}

While this works quite well, the XML is fetched from the XS1 for each value node. Looking forward for version 1.3 of openHAB, there is planned to provide a cache, so the XML would be fetched only once while the binding would fetch the data from the cache.

Sensor Values using the HTTP Binding

Done once, adding new sensors or switched using the XS1 takes just a few minutes. Changing the .*items configuration by adding new HTP bindings, copying and modifying the XSLT and adding of course adding the sensors and switches to the XS1.

Early 2011 MacBook Pro RAM Upgrade

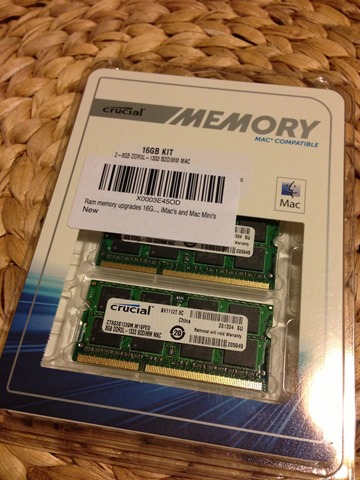
Since working more more in virtual machines and processing large amounts of data, I was looking to upgrade the memory of my early 2011 15” MacBook Pro currently utilizing 4GB of RAM. After digging through hardware specs and various manufacturer site, I decided to pick a 16GB kit from Crucial.

CT3327367 Crucial 16 GB Memory Upgrade

The specs of the memory chosen are 

  • Part Number CT3327367
  • Module Size: 16GB kit (8GBx2)
  • Package: 204-pin SODIMM
  •  DDR3 PC3-10600
  • CL=9
  • Unbuffered
  • NON-ECC
  • DDR3-1333
  • 1.35V
  • 1024Meg x 64

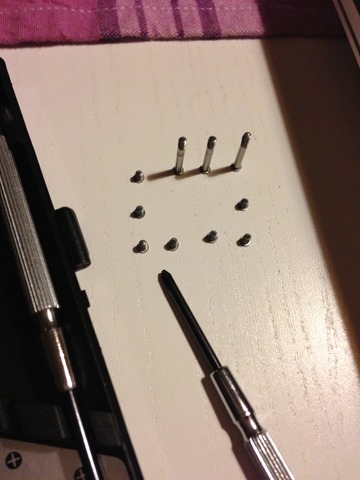
The only thing you need is a Phillips #0 screwdriver to remove the bottom of the MacBook.

Phillips #0 screwdriver for MacBook Pro

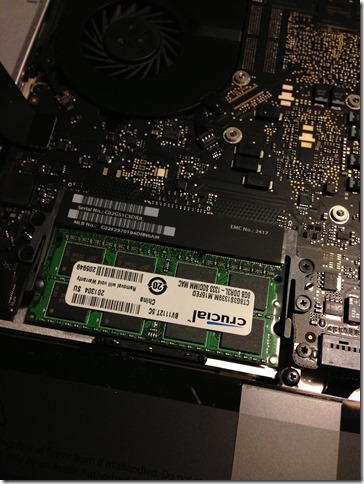
Old memory out, new in is pretty easy, both modules are on top of each other.

Crucial Memory Upgrade CT3327367

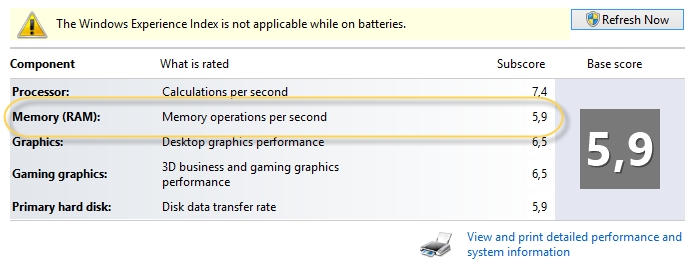
Once upgraded, I had to check the Windows Experience Index, if the new memory did change anything considering the performance, Actually the subscore for the memory went up from 5,9 to 7,6.

Windows Experience Index before memory upgrade

PerIndexNew

While I bought the MacBook, more than 4 GB was not a requirement. In addition the model is officially supported by Apple only up to 8 GB of RAM. However, the hardware can handle 16GB which now just comes in quite handy.

Hack-The-Planet Architectural Draft

After prototyping quite a lot, I finally came up with a simple architectural draft of the software for the first version of my home automation project.

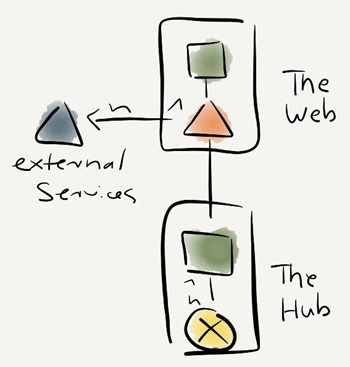
As this is a 10,000 feet view, I do not bother about the technical details for right now. I thought of two main components TheWeb and TheHub.

Architectural Draft

TheHub would be the one application, collecting data all the time from an arbitrary number of local sensors and controlling various actuators. At the same time it would push data to TheWeb to make it accessible to the outer space. I have thought of pros and cons about a push, a pull or even a pub/sub mechanism. For now pushing data will be much easier. Also, as this won’t be my main interface for interacting with the environment, there is no need to be up to date by the second.

The second component, TheWeb, will be a REST-architectural style Web service I will push the data from TheHub to, and which will provide data to the actual Web application. Also, the service will chat with various external services out there in the wild.

I was recently asked which notation I am using to draw my sketches: It’s called WebComposotion Architectur Model or simply WAM. It’s quite a simple notation for outlining architectural designs and dependencies in distributed and federated systems which include organizational boundaries. There is a series of publications, introducing the concepts behind WAM (my my book deals quite a lot with WAM as well):

In a nutshell, it is supposed to be a very easy to draw language to communicate architectural decisions. Maybe that’s something for another post, though.

With this basic design, I am ready to come up with some bits soon.