Halo – Luminous Gadget

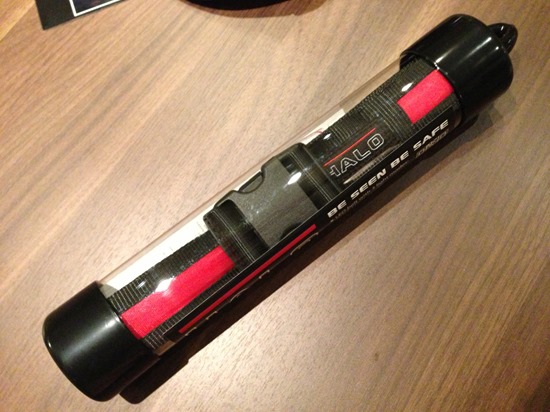
Another successful project, I backed on Kickstarter this year, was the Halo LED safety belt, meanwhile available from Halo Belt Company. Some days ago, I received my reward: one of the first Halo belts manufactured.

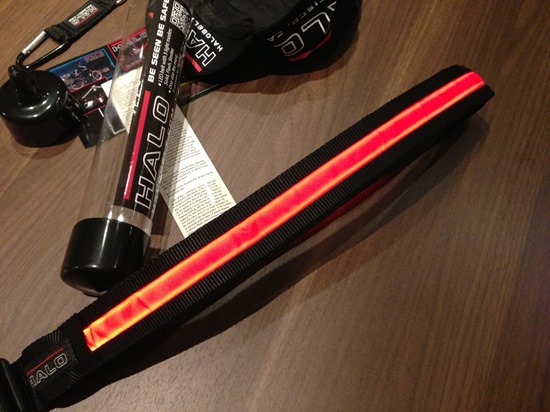
Halo LED Belt

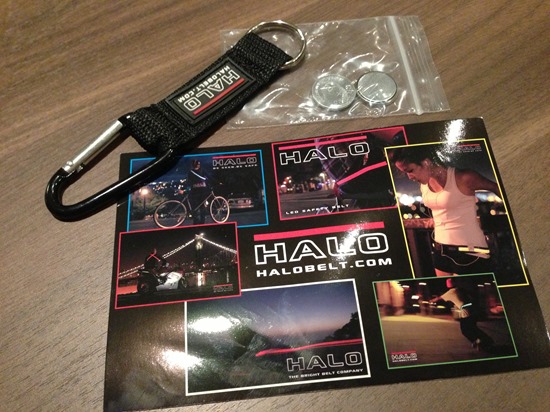
The makers of the halo belt put quite some effort to make the pledgers smile. The reward included a key chain, a cap, handwritten post card and an additional replacement battery. The belt uses a single CR2025 battery inserted into the belt buckle. One battery charge is supposed to last about 20 hours of continuous glowing.

We do use the belt now for roughly two weeks about one hour a day and we haven’t realized any loss in the luminosity, yet. The fabric the belt is made of is of an excellent quality and the light distribution within the fabric is equal on every inch.

Halo Belt Reward Content

The backers of the project received quite a bunch of stuff with their reward.

Halo Belt Extras

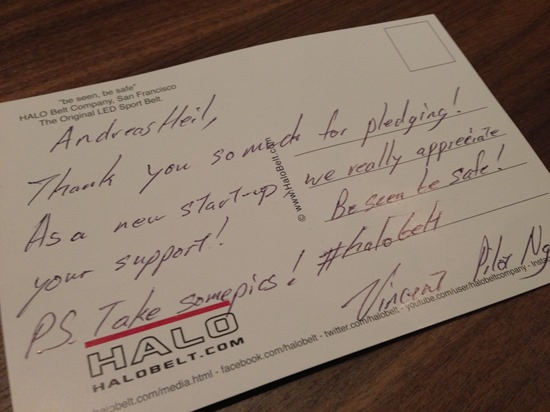
Most surprisingly, Vincent and his team put a handwritten note into the package. In fact this means they wrote about 500 cards to the project backers.

Handwritten Notes from Halo Belt

We’ve been that overwhelmed by the quality of the belt, we ordered a second one (different color) straight from the online store of the new start-up.

Hack-The-Planet Architectural Draft

After prototyping quite a lot, I finally came up with a simple architectural draft of the software for the first version of my home automation project.

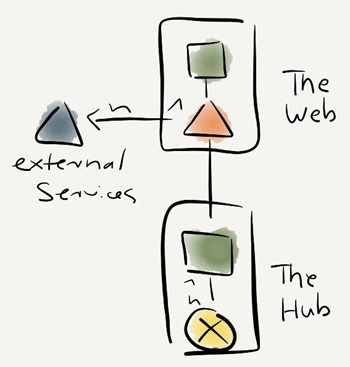
As this is a 10,000 feet view, I do not bother about the technical details for right now. I thought of two main components TheWeb and TheHub.

Architectural Draft

TheHub would be the one application, collecting data all the time from an arbitrary number of local sensors and controlling various actuators. At the same time it would push data to TheWeb to make it accessible to the outer space. I have thought of pros and cons about a push, a pull or even a pub/sub mechanism. For now pushing data will be much easier. Also, as this won’t be my main interface for interacting with the environment, there is no need to be up to date by the second.

The second component, TheWeb, will be a REST-architectural style Web service I will push the data from TheHub to, and which will provide data to the actual Web application. Also, the service will chat with various external services out there in the wild.

I was recently asked which notation I am using to draw my sketches: It’s called WebComposotion Architectur Model or simply WAM. It’s quite a simple notation for outlining architectural designs and dependencies in distributed and federated systems which include organizational boundaries. There is a series of publications, introducing the concepts behind WAM (my my book deals quite a lot with WAM as well):

In a nutshell, it is supposed to be a very easy to draw language to communicate architectural decisions. Maybe that’s something for another post, though.

With this basic design, I am ready to come up with some bits soon.

Fixing ASP.NET MVC 4 Web API 404

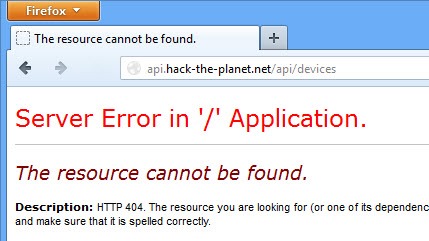
For a Web Service providing some REST-style URIs to access the data, I decided to use the ASP.NET MVC 4 Web API. Once developed, tested and deployed I experienced a mysterious 404 on my production server.

ASP.NET Web API 404

The Web API started originally as WCF Web API at CodePlex and is finally fully integrated within the latest .NET framework:

“ASP.NET Web API represents the joint efforts of the WCF and ASP.NET teams to create an integrated web API framework. You can get the bits and find articles, tutorials, samples and videos on the new ASP.NET Web API home page. All you have to do is to..”

The tutorials and examples for the ASP.NET Web API are overall easy to understand and you probably get  access to the technology very quickly. After I set up my first Web API, which worked absolutely perfect on Windows 8, developed using Visual Studio 2012 and tested with the IIS Express, I was not able to get the bits executed on the deployment server. It’s a Windows Server 2008 R2, IIS 7.5 and a whole bunch of stuff installed using the Web Platform Installer.

Make sure the .NET Framework is installed, probably you missed to install the 4.5 framework on the deployment server. As IIS is set up already, once again it is necessary to register ASP.NET for the latest framework using

C:\Windows\Microsoft.NET\Framework\v4.0.30319>aspnet_regiis.exe -i

Even now, I got the 404. Eventually, I got the tip to check out how the routing of extensionless URLs work in ASP.NET. By adding

<system.webServer>
    <modules runAllManagedModulesForAllRequests="true" />
    ...
</system.webServer>

to the web.config file of my Web API  the routing seems to work fine now.

Make it cozy – MacBook Pro and the third Monitor

A couple months ago, we got a second 24” monitor for each developer at the company I worked for. At that particular time, some of the developers still used some old 15” monitors as a second monitor. I spend quite some time to explain why it is important for companies to provide a good great work experience. You should aim at making your employees feel comfortable at work.  Following Starbuck’s a third place between work and home employers should try to keep the workspace as attractive as possible to their folks. Starbuck’s would not succeed with over 17,000 stores if the place where you can stay would not be attractive, though.

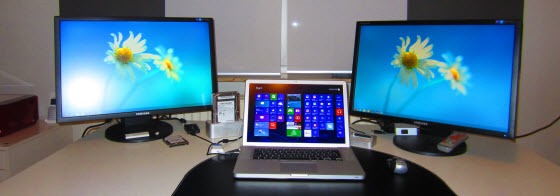
Said that, below is what my current home office workplace looks like right now. My Almost-Retina-But-Then-Again-Bought-To-Early-MacBook Pro, two external monitors with a total resolution of 1920×1200 + 1680×1050 + 1920×1200 and an Icy Box for easy swapping external 2.5” and 3.5” HDD drives and the  ElevationLab low friction iPhone dock, I backed at Kickstarter.

I run both, Windows 8 and MacOS Mountain Lion on my MacBook, depending what I need to do, I switch between both operating systems, all peripheral devices fully supported.

MacBook Pro Three Monitor Support Windows 8

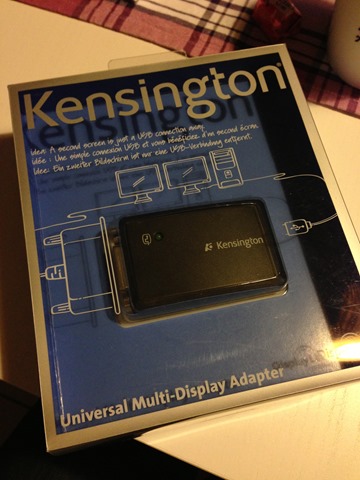
To get the third monitor working, I recently got a Kensington Universal Multi-Display Adapter from Amazon.de. Before attaching the device, make sure to download and install the latest drivers (both, for Windows 8 and Mountain Lion) from the DisplayLink website. If you do not install these drivers on Windows 8 beforehand, you might experience problems as there are already drivers offered by Windows Update. DisplayLink already provides support in case you experience any issues here.

Kensignton Univeral Multi-Diplay Adapter

I was quite surprised, DisplayLink already offers Windows 8 drivers. Quite skeptical about the external graphics card using USB as I read a lot about latency and quality, both, the quality of the device as well as the support for Windows 8 and Mountain Lion are just great. I do not experience any latency (I do not play games on the external monitor, though) so far and the quality of the output absolutely satisfying.

Hack-The-Hub Prototype

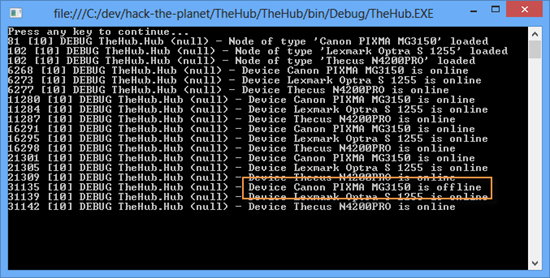
These days, I ordered the first bunch of hardware for my recent home automation project. However, beside all the sensors and actors I want to put into my home, I also would like to monitor and control as much devices as possible. Therefore, I came up with a little prototype to check whether some of my devices are online or not.

Candidates for my prototype where my

  • Thecus N4200PRO  (NAS)
  • Lexmark Optra S 1255 (LAN-enabled laser printer)
  • Canon PIXMA MG3150 (WLAN enabled inkjet printer/scanner)

My first thought was about using a tool such as Icinga for monitoring purposes. The tool is open source, well supported and used by many IT Pros in large companies. Icinga is based on NAGIOS, providing a REST API and a AddOn mechanism. However, the overhead to learn everything from the scratch was to much.

For now, I just wanted a prototype to verify whether my ideas work or not or if there are maybe any showstoppers.

While implementing the prototype, programmatically checking the availability using a simple ping was quite easy as the NAS and the laser printer both use a static IP address. However, the Wi-Fi-enabled inkjet printer uses dynamic assigned IP addresses from the DHCP server.

For the inkjet printer, only the MAC address is known. Chris Pietschmann wrote quite a nice post how to wrap arp.exe in a small .NET class, though.

For those not familiar with ARP, ARP is the acronym for Ethernet Address Resolution Protocol and was originally specified in the RFC 826arp.exe is a small Windows command line tool, allowing you to view the address translation tables.

“Displays and modifies the IP-to-Physical address translation tables used by address resolution protocol (ARP).”

Based on this, I wrote a small client capable of checking whether any device talking over TCP/IP is available or not if either the IP or the MAC is known.

Hack-The-Hub Prototype

Boot Camp Windows 8 – Me haz Drivers?

Works on my MachineYou own a MacBook Pro? You run Boot Camp? You run Mac and Windows? You want to upgrade to Windows 8 but you still hesitate because Apple has not released a new Boot Camp version supporting Windows 8? First of all: I did it. I have to admit, I haven’t spent a single though on drivers before I upgraded to Windows 8 – and still I just blog from Windows 8 on my MacBook Pro.

What happens when I upgrade?

If you upgrade, some devices will work some won’t.Even if the Microsoft Upgrade Assistant does not show any incompatibilities with any of the MacBook’s devices in its report, they probably won’t work.

Windows 8 Upgrade Assistant Report

After installing, Windows 8 will show various devices in the Devices list indicating, there are no drivers available. Other’s simply won’t be detected at all, e.g. Windows8 won’t be able to detect the MacBook Pro’s WiFi at all. Function key, keyboard backlight won’t work and the graphics chipset might reset the screen resolution between the MacBook’s native resolution and something about 800×600 from time to time.

Where to get the Windows 8 drivers for my MacBook Pro?

To solve the driver issues, you simply start the Boot Camp Assistant from your Mac OS and follow the instructions until you find yourself faced with the following dialog.
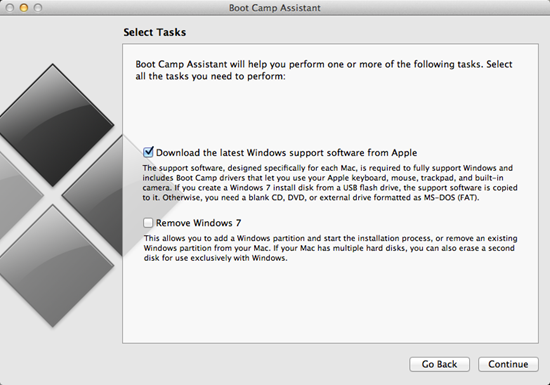
Boot Camp Assistant Task

Chose Download the latest Windows support software from Apple and continue. In the following step follow the on screen instructions either burning a DVD/CD or copying the files to a USB drive or any folder accessible from Windows (don’t drop the files to the Mac OS’s partition, though).

Will it blend work?

Restart Windows 8 and insert the disc, stick and select the setup.exe in the WindowsSupport folder. This will install a whole bunch of drivers.
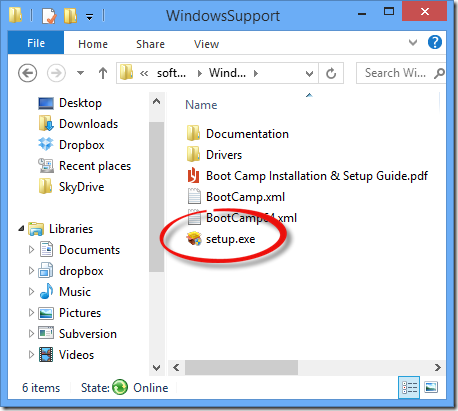
Boot Camp Windows Drivers

Based on Apple’s Boot Camp 4.0 FAQ , the Windows Support Files contain the following drivers

  • Apple Bluetooth
  • Apple Keyboard Support
  • Apple Remote Driver
  • Apple Trackpad
  • Atheros 802.11 Wireless
  • ATI Graphics
  • Boot Camp control panel for Microsoft Windows
  • Boot Camp System Task Notification item (System Tray)
  • Broadcom Wireless
  • Intel Chipset Software
  • Intel Integrated Graphics
  • iSight Camera
  • Marvel Yukon Ethernet
  • nVidia Graphics
  • Cirrus Logic Audio
  • Realtek Audio
  • SigmaTel Audio
  • Startup Disk control panel for Microsoft Windows

Once installed and the machine restarted, everything seems to work fine, the Windows Bluetooth and Boot Camp icons are shown in the notification area, light sensor, FaceTime camera and sound work perfectly and the graphics card runs smooth like butter.
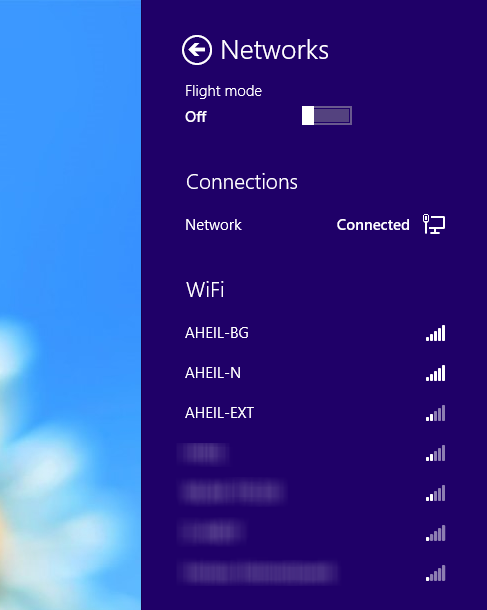
Windows Networks under Boot Camp

One last word on function keys – they won’t work out of the box. You have to start the Boot Camp Control Panel from the tray and switch to the Keyboard tab.There check the Use all F1, F2… box.
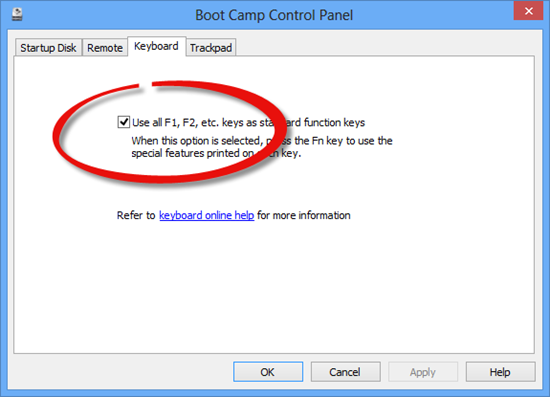
Boot Camp Control Panel

Windows 8 on the MacBook Pro is a great experience even without touch display and retina. Upgrading without checking for the drivers of course was a greenhorn mistake. However, I hoped (yes I know indeed, hope is not a strategy) during the inplace upgrade, Windows will keep the drivers. However, the fact that all drivers still work, clearly shows that the driver architecture from Windows 7 to Windows 8 did not change at all. That’s good as manufacturers do not need to update drivers in a hurry based on a new architecture, but on the other side it shows that there are not that many improvements how Windows deals with the hardware. But again, maybe this is not necessary at all.

Before you upgrade to Windows 8, run a backup! I did so using Acronis True Image 2013. Even without thinking about drivers, I was not sure whether the upgrade process with Boot Camp on the machine will maybe brick my box. Also run a backup of you Mac OS partition using Time Machine.

Said that kids, please bear in mind, that this worked fine on my machine, and might fail on yours. Also there is probably no support from Apple for Boot Camp 4.0 running Windows 8.

Because you’ve been so impatient with the Upgrade Assistant – How to get the Windows 8 ISO File

Windows 8 is there. Two days are gone and after waiting so long, you probably already purchased and downloaded Windows 8, as Microsoft came along with a time limited offer for a great price model, if you already have a PC running Windows XP, Vista or Windows 7

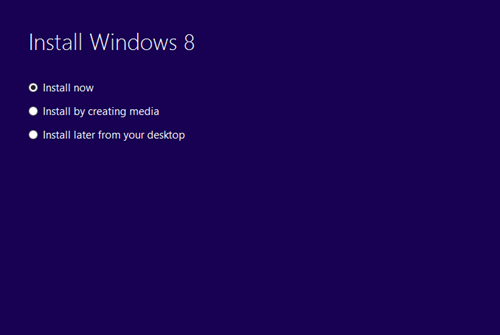
Once you run through the purchase process (they accept credit card or PayPal), at one point after the download finished, the Windows Upgrade Assistant comes up with the following dialog:Install Windows 8

Because you’ve waited for so long you are quite impatient and go straight  for the first option because you think you can create the media later one… If done so, the Upgrade Assistant will install Windows 8. Eventually, there won’t be any option to create the media later on.

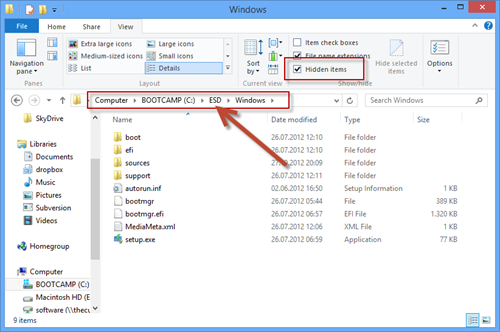
What now? If you just need the files, you can turn on hidden files in Windows Explorer (it’s now in the Ribbon). You will see a folder ESD on the root of your drive containing a Windows folder with the downloaded installation files. Go ahead and make a backup if required.

Hidden ESD Folder

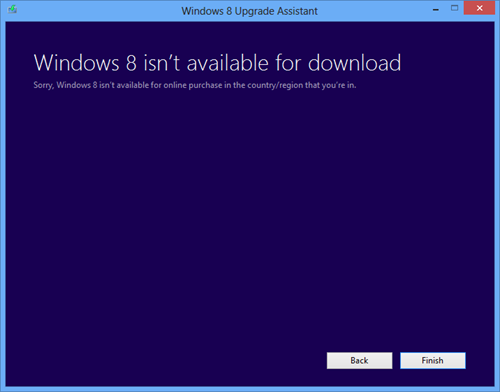
If you try to create an .iso file using the Upgrade Assistant again, you probably fail by getting the following result.

Windows 8 isn't available for download

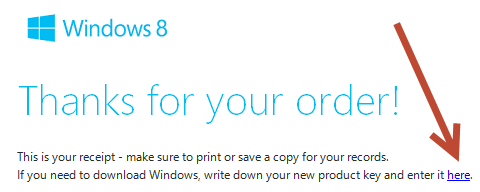
In case you still need (or just want) the .iso file, there is a way to obtain it. First of all, check your mail for the order confirmation of your Windows 8 copy. At the very top of the mail, you will find a link to download Windows again.

Thanks for your order

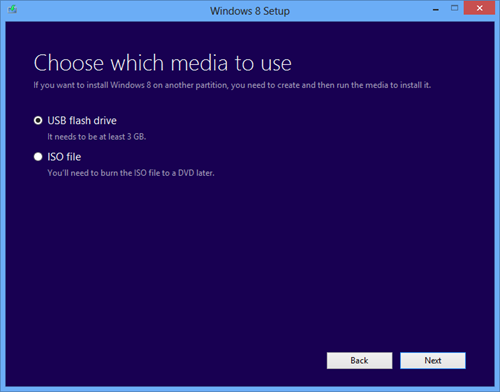
Following the link, you will download the Windows 8 Setup (windows8-setup.exe). Once started this will straight let you choose whether to install, download or to postpone the installation as seen above. Chose Install by creating a media and either choose to burn a DVD to to copy the files on a USB stick (3GB required, though).

Choose which media to use

You will be asked to choose the place where to save the .iso file, after which the download process starts immediately.

That’s all you have to do. Whether you have been impatient, clicked to fast, did not read carefully or just clicked ‘next’, ‘next’, ‘next’, there is still a way to get the .iso file afterwards.

How to get the favicon.ico from any Page

Recently, I was in the need of retrieving the favicon.ico file from a website. As I had to process the file programmatically and render it on a website, it would have been quite a lot of manual work to get the .ico file and make sure the browser does render it in the correct way. After digging around, I learned about a secret URI probably provided once by Google’s social bookmarking service Google Shared Stuff. While Google Shared Stuff was launched in 2007,  it was already discontinued in 2009. However, this one URI seems to work perfectly maybe because it is still used within Google extensively.

The Secret

To get the favicon.ico file from any arbitrary page you simply have to use an URI using the following pattern:

http://www.google.com/s2/favicons?domain=www.example.org

Eventually, this URI will provide you the following image: Image retrieved using http://www.google.com/s2/favicons?domain=www.example.org

How it Works

Some More examples to see how it works:

  • Facebook
  • TechChrunch
  • aheil blog
  • Google
  • dotnetpro Magazine
  • heise.de
  • Google+

As most of the sites do keep their favicon.ico file right in the root of the web site, others like Google don’t. Actually, you might find Google’s plus icon located at

https://ssl.gstatic.com/s2/oz/images/faviconr2.ico

While this is probably not a problem retrieving the favicon.ico file using the standard URI at all, the secret URI provides one major advantage: you’ll get the icon as a nice 16×16 PNG file, ready to be rendered in any <img> tag right away.

The Risk

As every time building up on a Google service as I did before, it might disappear tomorrow without notice leaving your site with quite a bunch of 404s though. Even worse, as it seems there is no official support for this URI, there won’t be any notice or deprecation period until switched of as done for other services like Feedburner.

Inbox Zero – Does it Work?

Recently, I explained to a colleague the idea behind inbox zero which was introduced by Merlin Mann. Since I introduced inbox zero more than a year ago  for my personal mailbox, I literally save time each day.

How does it work?

Four simple steps are the secret behind not using your mailbox as an personal wikipeda:

  1. Answer it
  2. Archive it
  3. Transform it into a task
  4. Delete it

And for heavens sake, do not use any highly sophisticated taxonomical folder structures to archive your mail. Use one (or if really required just a few) archive folders. The search capabilities of today’s email clients are outstanding or if you are using a IMAP server searching by using the server’s database engine is just aewsome. If you are not satisfied with your client search engine try tools like xobni.

Does it work?

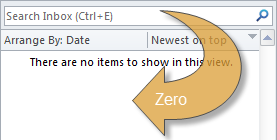
Zero Inbox - Please do not stop, nothing to see here...It does. For example, to maintain my inbox in this (zero) state, did cost me 14 Minutes this morning. This morning, there was noting to answer, and nothing that important to archive. I had to change a few mails into tasks while I was able to perform most of them immediately.
  • I got the information about an updated MEAP e-book from Manning, so I downloaded book and deleted the mail
  • I got an information someone asked a question on a blog comment I wrote, so I answered it
  • I got a request to write an article from the chief editor, so I created a task in my backlog
  • I was told there is a new credit card statement available, so I downloaded it.
  • I was informed, there is a new O’Reilly e-book available in my personal book list, so I simply kicked of the DropBox sync (which is an awesome feature, I wrote recently about)
  • I got a link about an interesting blog article I should read later on, so I created a task in my backlog

Why does it not work for you?

You tried inbox zero, but it does not work for you? Your mailbox already contains an endless list of mails? Here are some reasons this happens to many of you:

  • You maintain no backlog or todo list, neither written nor digital. Of course there is no place where to keep tasks.
  • You have a list but it now has as much tasks as your inbox mails before. So you tend not to move any mails in there as tasks… That’s another problem as you do not work on your tasks… I’ll probably write up how to do so in a further article.
  • You don’t transform mails into tasks, because the tasks are boring, stupid or just unpleasant… Probably that’s what happens to most of you.

If you have a look at the task list above, there were many things not being pleasant at all. Downloading the books is just stupid work, a task you perform again and again (I already consider to write a script for that). O’Reilly provides this great synchronization feature to DropBox. Still leaves you to log in to yet another site and find the download list to kick of the sync, though.

How to improve the annoying?

What would keep me from performing these tasks? What’s the most annoying thing I had to do? Right, I had to sign into four different portals to perform tasks. I use a tool that speeds up this process and does not keep me from doing my actual work. I simply use the Firefox plugin Password Hasher which allows you to quickly create and use passwords for different sites.  Eventually, the annoying task of logging in into different sites became less brain busting and therefore, I have no reason to put the mails on the back burner anymore.

MacBook Pro’s Bluetooth Gone Fishin’

Today, I spend literally hours in trying to fix a hardware problem on my MacBook Pro as the Bluetooth suddenly went fishing without saying anything to me. Said that, I run Apple’s Booot Camp with Mountain Lion and Windows 7 which makes troubleshooting sometimes easier, sometimes harder. As I turned on my MacBook Pro this morning my Microsoft Wireless Notebook Presenter Mouse 8000 (great device but a way too long name) mouse was – let’s say – working but not working. Left and right button and mouse movements worked fine but the mouse wheel as well as the middle button did not work at all. I followed some simple debugging rules from David Agan’s book Debugging The 9 Indispensable Rules for Finding Even the Most Elusive Software and Hardware Problems how to analyze faults in systems.

For the Impatient Ones

Jump to the very end of this article, do not learn anything, do not improve your analytic skill by one but see how to fix it.

Check The Plug

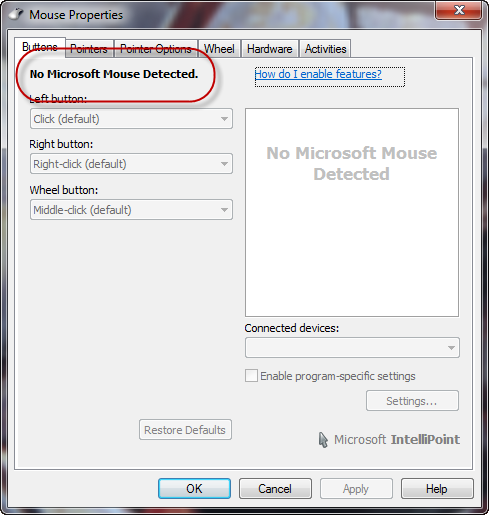
First, I checked the Microsoft IntelliPoint software (Still working? Latest version?) and it said there is no Microsoft Mouse connected.

No Microsoft Mouse Detected

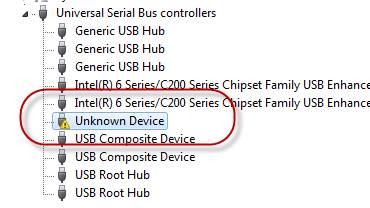
Next step, I checked Windows Device Manager telling me here is a unknown device. Maybe Windows did not know, but I was pretty sure the device Windows did not want to know anymore today was the MacBook Pro’s Bluetooth chip.

Unknown Device

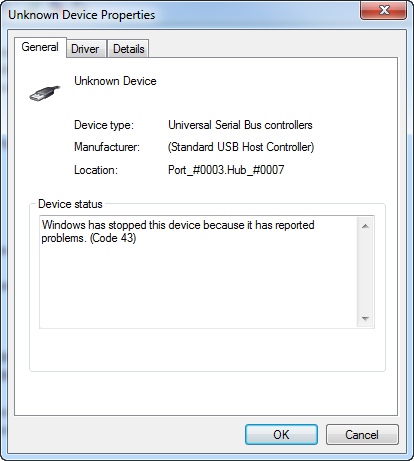
I checked the device properties and found that

“Windows has stopped this device because it has reported
problems. (Code 43)”

What kind of problems, you’ll probably never known.

Unknown Device Properties

If you dig a bit you’ll probably come along the TechNet entry for Error Code 43 saying

“A device driver notified the operating system that the device failed.”

With some years of experience in this kind of business, I tried of course

  • kicking the laptop (most of the time works quite fine with other people’s hardware)
  • rebooting several times
  • un- and re-installing the device drivers
  • running Windows’s Hardware and Device troubleshooting

Make it Fail

As nothing worked out for me, I rebooted into OS X to figure out if the device fails here as well and found a similar situation – Bluetooth went into its weekend saying

“Bluetooth: Not Available”

Eventually, that’s no driver issue, that’s definitely a hardware problem. One machine, two operating systems, different drivers (well module in OS X) resulting in a similar failure. Saturday noon and a not that satisfying Apple Store density in Germany, there is little one could do before next Monday. Hardware dies; usually at the most unpleasant moment you can imagine and nothing you can do about that.

Bluetooth: Not Available

Get a Fresh View

I did not follow the debugging rules in their given order, but I always try to keep the rule Get a Fresh View in mind. Often one is biased by some ideas in ones mind, some posts read while doing research or personal previous experience.

Eventually, I remembered what I have learned about power cycles during studies and realized that rebooting nowadays is not a hard reset of your machine anymore – there have been times (I do still remember) when PCs provided a (at least by me frequently used) reset button causing the device to hard reboot by turning the power of and on again.

So what’s the difference by rebooting the laptop several times, or booting into another OS? Right, this is no cold start and probably all devices keep their previous (faulty) state even after the reboot. As a consequence, plug out the power source, turn of the machine – leave it for a few seconds and turn it on again. Bluetooth is up and running again for both, Windows and Mac OS.