Check and Fix the Shellshock Exploit on Mac OS X

Since I switched to Mac in 2011, I do not keep that much track of vulnerabilities as I did running Windows as my main system. However, the recently announces Shellshock exploit got my attention. As Apple has no patch in place by today, I went for a manual path of the bash shell. Only precondition is Apple’s Xcode being installed on your system.

First, checking whether your  system is vulnerable, you simply need the following bash script being run:

env x='() { :;}; echo not' bash -c 'echo safe'

In my case, unfortunately, I got a

not
safe

on my shell, running Mac OS X 10.9.4. Checking the version is simple done as following:

bash --version
GNU bash, version 3.2.51(1)-release (x86_64-apple-darwin13)
Copyright (C) 2007 Free Software Foundation, Inc.

In case you passed the check, you should run a second one, as since Thursday, there is a second attack vector knwon

env X='(){(a)=>\' bash -c "echo date"; cat echo; rm -f echo

The good news, not vulnerability from this vector.

date
cat: echo: No such file or directory

In case one would get the current date and time, there would be vulnerability, too.

As there is no patch from Apple right now, there is an possibility to build an update manually from the GNU repositories.

mkdir bash-fix
cd bash-fix
curl https://opensource.apple.com/tarballs/bash/bash-92.tar.gz | tar zxf -
cd bash-92/bash-3.2
curl https://ftp.gnu.org/pub/gnu/bash/bash-3.2-patches/bash32-052 | patch -p0
cd ..
sudo xcodebuild

In case you are vulnerable to the second vector, there is a another path to be applied:

mv build/bash.build/Release/bash.build/DerivedSources/y.tab.* bash-3.2/
cd bash-3.2
curl https://ftp.gnu.org/pub/gnu/bash/bash-3.2-patches/bash32-053 | patch -p0
cd ..
sudo xcodebuild

By running

bash-fix/bash-92/build/release/bash --version 
bash-fix/bash-92/build/release/sh --version

you should be able to verify the version of the fix.

GNU bash, version 3.2.52(1)-release (x86_64-apple-darwin13)
Copyright (C) 2007 Free Software Foundation, Inc.

Before replacing the old version, I backup the original bits.

sudo cp /bin/bash /bin/bash.3.2.51.bak
sudo cp /bin/sh /bin/sh.3.2.51.bak

Now you can replace the original ones by

sudo cp bash-fix/bash-92/build/Release/bash /bin
sudo cp bash-fix/bash-92/build/Release/sh /bin

Once this is done, you can check for the exploit again

env x='() { :;}; echo not' bash -c 'echo safe'
bash: warning: x: ignoring function definition attempt
bash: error importing function definition for `x'
safe

Once verified, you can get rid of the bash-fix folder and your system should be safe from this exploit.


Miataru Update 0.2-16

The latest update on the Miataru SailfishOS client just landed on OpenRepos.net. The latest version just introduced some baby steps. The settings page was finally activated and settings for the server data retention time were introduced.

SettingsCurrently, SSL based server URLs are not supported, yet. Using the original Miataru server, you need to fall back to http://service.miataru.com instead.

Data server retention time is specified in minutes, currently 1minute to 24 hours (1440 minutes) are supported and sued with the update location requests.

More to come…


Miataru Updated v0.2-15 – Colorized Devices

Today, yet another update of the Miataru Client for SailfishOS went public. As the basic functionality finally works, it was time for some feature update. First of all we introduced the possibility to update the device information. Beside changing he name, choosing a particular color for the map indicator is now available.

Device DetailsTo access the detail page, press and hold a device on the device page, and choose Details afterwards.

Changing Device DetailsFinally, the chosen color will be used to display the device on the map.

0.2-15_map

The new features ware available from version v0.2-15 on.

Next improvements will probably consider the maps, displaying additional device information as well as a improved way of displaying the devices on the map.

Next Miataru Update

Tonight, we managed to remove the most issues with the Miataru SailfishOS client. With v0.2-14 the location information of the device gets finally used, the location of the current device as well as other devices are displayed correctly, the map is centered to your actual location and some more minor issues got fixed.The latest version is available at  OpenRepos for JailfishOS via Warehouse.

In addition, we added a page displaying some debug information. Current location, as well as the most recent requests and responses from to and from the Miataru server. By this it’s completely transparent what information is exchanged between your device and the server. Actually, this is possible because the protocol of Miataru is completely open, no secrets, traps and hidden information are sent to the server.

Debug InformationThere are some known issues you should be aware of. However, please bear in mind at the current version it is still an alpha version of the software, though.

  • Communication with the Miataru server takes place only on the map page, location information is not updated in the background
  • Most recent requests on the Debug Information page are only displayed when the Map was used before.
  • Accuracy on the Debug Information page is not displayed. It is used in the requests though, as you can see in the requests.
  • When upgrading from an earlier version, some settings (Server URL, Devices etc.) might get lost. This is due to an arrangement of the settings database, however, it’s an alpha. We introduced some process to avoid those braking changes for the future (hopefully).
  • The map indicators might overlap when providing common coordinates. While two or more devices are on close together, it might look on the map as there is only one device as the indicators on the map overlap.

Said that, you should be able to use it from now on. As the basic feature now work proper, we will start pimping the app by adding more features and fancy stuff over time.

Stay tuned…


SailfishOS Miataru Client 0.2 available

Today, we pushed version 0.2 of the SailfishOS Miataru client to the OpenRepos. From there it’s available via the Warehouse app.

First of all, Cyril Lintanff took some effort and came up with an awesome logo for the SailfishOS app.

Miataru IconWe took the the original Miataru M from the iPhone app, and used it with well aligned with the SailfishOS guidelines. If you check the M it is a marker on a map, where the SailfishOS logo is used as contour map. All the credits for this mind blowing design belong indeed to Cyril.

With version 0.2 we fixed the recent start up issue, where as the app did start once and only once. We also introduced some kind of a database revisioning which makes it simple to update databases from any version you are currently running to any higher version. The first start might take a second or so more, however, we save some milliseconds when switching pages within the app.

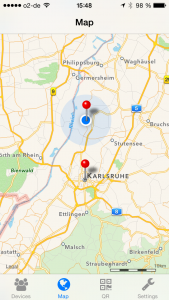
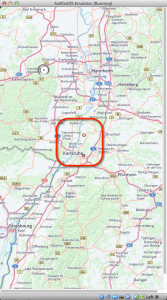
Miataru First PageIn addition, thanks to Daniel for a bunch of live debugging on the Miataru server, we were able to fix some malformed requests (which ended up in new test cases for the Miataru server as well ). We now can display all devices you added to the device list on the map in the SailfishOS Cllient. Unfortunately, your own device does still stick on the coordinates of Karlsruhe, Germany, where the app is currently developed. I haven’t managed to fully access the internal position API of the Jolla phone, yet – however this is the next bit we are currently working on.

Miataru Map on SailfishOS There’s no dedicated discussion forum or bug tracker yet, however the easiest way to send in any requests or questions regarding the app is the OpenRepos page of the app. It’s currently open for comments and being read frequently.

Stay tuned for the next update, though…

Miataru for SailfishOS and Jolla

A couple of months after Daniel came up with Miataru, I finally extendet the Miataruniverse with a native SailfishOS app.

What’s all About

After Google Latitude went down, he was looking for a new solution how to exchange location information with others. Basically, Miataru let you know where other devices are. That’s all. With an unique identifier, the device submits its location on a regular base. If you know the device identifier, you can show the location on your map.

The Jolla App

Beside native apps, Jolla can run Android apps from Google play. Anyway, native apps  simply look much better. As the SailfishOS SDK is still in its alpha, its quite an adventure to develop for it.

Miataru for iOSMiataru for iOS

Miataru for SailfishOSMiataru for SailfishOS

Where to get it

Despite all issues, we just pushed the very first version of the Miataru for SailfishOS on OpenRepos. From there, you can install and updating it using Warehouse for SailfishOS.

Early Alpha

The version available is an early alpha, with very limited functionality. It is basically intended to test the communication between the app and Miataru server as well as the OpenRepos setup. Also due to limitations in the current version of the SailfishOS SDK, the positioning functionality is not yet supported.

Updates will be released on OpenRepos based on the further progress of the SailfishOS SDK. News about the releases will be published here.

Fighting Qt Creator develpoing for SailfishOS

Prologue

For some days, I fight quite an epic battle with Qt Creator. A battle, I am losing right now. I recently started developing a SailfishOS app though. A spare time project which actually drives me mad. To be fair, one should say SailfishOS is quite at an early stage compared to other platforms. However, the SDK, the tool chain, including Qt Creator, VirtualBox integration, build and deploy process already work as a charm. It works out of the box. Even for someone like me, pampered by Visual Studio, Eclipse and corresponding platforms existing for a decade and more.

There are some shortcomings in documentation, though. As a developer myself, I know how hard it is to get some good documentation in place. Therefore, kudos for everything available already. Although, I spend 95% percent in digging the darkest places of the internet to find some information. I have to move out of my comfort zone, which is good. I learn a lot by digging around, which is even better. However, I do not get my project out of the starting blocks, which is bad.

Teh Facts

Following the tutorials available, I tried to create a SailfishOS dialog with two text fields as below.

import QtQuick 2.0
import Sailfish.Silica 1.0

Dialog {
    id: addDeviceDialog
    property string deviceName
    property string deviceIdentifier 

    anchors.fill: parent

    DialogHeader {
        title: qsTr("Add a Device")
    }

    TextField {
        id: deviceNameField
        placeholderText: qsTr("Device Name")
    }

    TextField {
        id: deviceIdentifierField
        placeholderText: qsTr("Device ID")
    }

    onDone: {
        if (result == DialogResult.Accepted) {
            deviceName = deviceNameField.text
            deviceIdentifier = deviceIdentifierField.text
        }
    }
}

Qt Creator, however, responds with

Could not resolve the prototype ‘TextBaseItem’ of ‘TextBase’. (M301)

I encounter this issue wit both, TextField and TextArea.

M301

I can remove this issue by adding

import QtQuick.Controls 1.0

But then Qt Creator responds with

Qml module not found

Modules seem to be installed and paths are set. I probably miss something over here or I do deal with the IDE in a terrible wrong way.

QtQuick.Controls 1.0I will dig further and contact the SailfishOS mailing list, looking forward to get some help there to update this article soon.

[Update, 13.07.2014]

There was an almost instant reply on my request on the mailing list, though. You can completely ignore this issue. Gt Creator will build and deploy without any issues. In my very case, I had an additional issue, where I forgot to set the width property of the text field. Once I did this, I was able to see the text field on my deployed app.

Wiping all your iPhone’s Photos

Since iOS 7, the possibility to wipe your entire camera roll in iPhone has gone for good. In case you have  a lot of photos on your devices, deleting all of them might be quite an elaborate job to do.

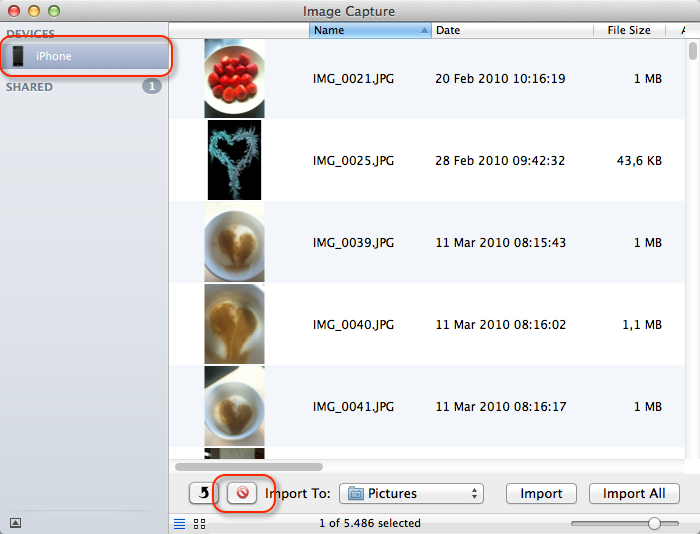
To make it quick, there is still a possibility, if you have your Mac at hand. Connect your iPhone and start Image Capture which comes with your Mac OS X.

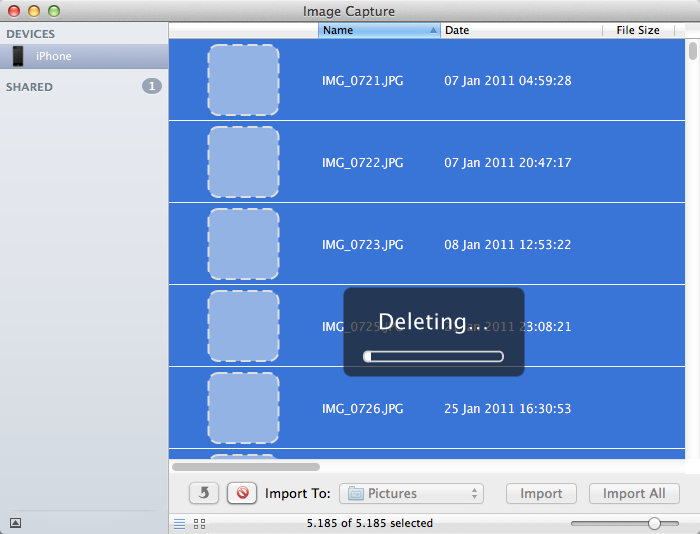
Image CaptureMake sure to select your iPhone on the right hand list, select all (⌘+a) photos from your device and press the delete bottom located at the bottom of Image Capture.

Deleting...Depending on the number of photos on your device this might take some time.

Make sure to import your photos beforehand either using Image Capture as well or some synchronization such as Dropbox’s Image Upload.


The McGyver GIT Survival Guide

Working with version control system is one of the elementary skills for each and every software engineer. Over the years, I worked with CVS, Subversion, SourceSafe, Perforce as well as Mercurial. Within Microsoft, I worked a lot with Source Deport and Microsoft Team Foundation Server. At home I run my dedicated SVN repository. In fact, I don’t feel comfortable when not being able to check in source code at all.

For my personal projects, Git especially Github works quite well, however, since the openHAB project moved from Google Code (Mercurial) to GitHub, I deal with quite a lot of issues within Git over and over. Currently we have more than 50 60 forks and more than frequent pull requests. Therefore, keeping your local branch permanently in sync is quite inevitable.

Abstraction None
The worst thing about Git is the fact, the user interface and console commands seem to reflect the Git implementation bit by bit. Personally, I have the feeling there is zero abstraction for the user. Even worse, when used to non distributed systems like SVN or TFS doing simple syncs and commits, the concepts behind Git might drive one mad.

Small Steps
This seems obvious, however, try to make only small commits to the repository. The more collaborators you have, the more challenging it might become to merge. At the same time, the less experienced you are with Git, the smaller your checkins should be. Commit single files, minor changes as isolated as possible. This will make you life just so much easier.

Daily Routine Conflicts
As daily routine, fetching and merging the local branch should be done via

git fetch upstream
git merge upstream/master

Usually, this should work quite well unless there are changes on local files that should not be merged at all or you have done changes not to be merged yet.

Updating e21a751..349468b
error: Your local changes to the following files would be overwritten by merge:
        foo/bar/buzz.ext
Please, commit your changes or stash them before you can merge.
Aborting

To just avoid the merge stash the changes via

git stash

Do the merge, and than pull the stash.

git stash pop

Again, usually this should work fine unless the merge results in a conflict which cannot be resolved automatically.

Auto-merging foo/bar/buzz.ext
CONFLICT (content): Merge conflict in foo/bar/buzz.ext

Simply run

git mergetool

to solve the issues and try to pull the stash again.

Delete from Repository only
To remove a file from the repository whilst keeping it locally just performa a

git rm --cached myfile.c

Bear in kind, this git will realise this file immediately as a new. rm works on folders as well, though. Anyway, this will become very handy once you accidentally check in files that are not intended to be checked in.

Backup early – Backup often
Just in case you don’t know what’s going to happen e.g. due to a larger refactoring – move the current state into a new brach as backup right after a commit

git branch my-backup-work

Reset to Remote
Ok, this one gave me quite a hard time, as I had changes checked in my forks but needed to reset particular files to the current revision of the original repository (not your local branch and neither your fork).

To do so, reset your working copy to the upstream master:

git remote update
git reset --hard upstream/master

Afterwards push this new branch-head to your origin repository, ignoring the fact that it won’t be a fast-forward:

git push origin +master

you might have something like

Fetching origin
Fetching upstream
remote: Counting objects: 685, done.
remote: Compressing objects: 100% (336/336), done.
remote: Total 507 (delta 249), reused 321 (delta 87)
Receiving objects: 100% (507/507), 6.57 MiB | 146.00 KiB/s, done.
Resolving deltas: 100% (249/249), completed with 64 local objects.
From https://github.com/aheil/example
   f55f8b0..e060456  master     -> upstream/master
macbook-pro:example andreas$

Reverting to a specific Revision
This one is easy, you simply need to tell git the hash of the revision you want to check out. This works quite well, however, you always need to consider the visibility of the branch you want to check out. To understand the reachability in git, you might want to read this article.

git checkout e095 -- somefolder/somefile

Conclusion
In my very personal opinion, Git is s**t if you are used to centralised repositories. If you worked a lot with Mercurial, Git is simply to complex. Git is not abstract enough. When working on code, I want spend 99% on the code and 1% on the revisioning system, not the other way around. When working on the open source projects, I currently waste a major part of my time on Git.

I probably will never setup and run a personal git server (I do run a SVN server and did run CVS before) and I probably will not maintain any Git servers (I did at work maintain Microsoft TFS, SVN and CVS servers, though).

Git is great when it comes to some kind of mass collaboration (but I haven’t found anything so far Mercurial won’t offer for the same purpose). While everybody plays nicely together, it works just great.

As there is much more to learn about Git, you eventually want to pick Pro Git to get some insights.

Removing Failed Thecus Moule Installations

For whatever reason it might happen, a module installation on a Thecus NAS Server won’t succeed. In such a case even removing the module might fail. In my case, I had to troubleshoot my Thecus N4200PRO with the latest 32-bit firmware 5.03.01.

Symptoms

Symptoms included a module which did not start at all with the message

Module[Mail Server]: Enable Fail.

and uninstalling the module stopping with the message

Module[Mail Server]: Uninstall Fail.

Even worse, re-installing the module was not possible as the server assumed the module already was installed and uploading the module manually failed as well.

To solve this kind of Mexican standoff you probably need to dig somewhat into the Thecus, though.

Prerequisitees

First of all make sure the SSH module (HiSSH) is installed and enabled.

HiSSH Module

You need to log in via the user root using the same password provided for your admin user, though.

macbookpro:~ andreas$ ssh 192.168.1.254 -l root
root@192.168.0.101's password:
root@127.0.0.1:~#

Cleaning Up

Depending what failed during your installation, only some of the following steps might be necessary to clean up the module.

Files related to the module might be found in the following three directories and need to be removed.

/raid/data/module/cfg/module.rc/
/raid/data/module/
/img/htdocs/module/

In case anything related to your module can be found there (such as Mailserver in my very case), you can remove them with one of the following commands.

rm -rf "/raid/data/module/cfg/module.rc/Mailserver.rc"
rm -rf "/raid/data/module/Mailserver"
rm -f "/img/htdocs/module/Mailserver"

Once all related files have been removed, you now head for the database and clean up the two affected tables. As sqlite won’t give any feedback about succeeded operations, makew sure entries are there before cleaning up and are gone afterwards.

root@127.0.0.1:~# /opt/bin/sqlite /raid/data/module/cfg/module.db "SELECT * FROM module WHERE name = 'Mailserver'"
Mailserver|2.00.02|Mail Server|No||md_mailServer.png|User|www/index.htm|User

root@127.0.0.1:~# /opt/bin/sqlite /raid/data/module/cfg/module.db "DELETE FROM module WHERE name = 'Mailserver'"

root@127.0.0.1:~# /opt/bin/sqlite /raid/data/module/cfg/module.db "SELECT * FROM module WHERE name = 'Mailserver'"

If the deletion works well, you should experience some delay after the delete statement was executed.

root@127.0.0.1:~# /opt/bin/sqlite /raid/data/module/cfg/module.db "SELECT * FROM mod WHERE module = 'Mailserver'"
Mailserver|1|type|Install
Mailserver|1|ModuleRDF|Install
Mailserver|1|ModuleRDFVer|1.0.0
Mailserver|1|Name|Mail Server
Mailserver|1|Version|2.00.02
Mailserver|1|Description|Mail Server
Mailserver|1|Key|Mailserver
Mailserver|1|Authors|Davide Libenzi
Mailserver|1|Thanks|XMail by Davide Libenzi
Mailserver|1|WebUrl|http://www.xmailserver.org/Readme.txt
Mailserver|1|UpdateUrl|
Mailserver|1|Reboot|No
Mailserver|1|Icon|md_mailServer.png
Mailserver|1|Mode|User
Mailserver|1|HomePage|www/index.htm
Mailserver|1|MacStart|
Mailserver|1|MacEnd|
Mailserver|1|Show|0
Mailserver|1|Publish|1
Mailserver|1|Login|1
Mailserver|1|UI|User
Mailserver|4|type|NAS
Mailserver|4|TargetNas|Thecus
Mailserver|4|NasProtol|N7700
Mailserver|4|NasVersion|5.00.00.12
Mailserver|5|type|NAS
Mailserver|5|TargetNas|Thecus
Mailserver|5|NasProtol|N5200
Mailserver|5|NasVersion|5.00.00.12
Mailserver|6|type|NAS
Mailserver|6|TargetNas|Thecus
Mailserver|6|NasProtol|N4100PRO
Mailserver|6|NasVersion|5.00.00.12
Mailserver|8|type|DependCom
Mailserver|8|DependName|MySQL_5
Mailserver|8|DependVer|2.0.0
Mailserver|8|DependUrl|

root@127.0.0.1:~# /opt/bin/sqlite /raid/data/module/cfg/module.db "DELETE FROM mod WHERE module = 'Mailserver'"

root@127.0.0.1:~# /opt/bin/sqlite /raid/data/module/cfg/module.db "SELECT * FROM mod WHERE module = 'Mailserver'"

Once both tables are cleaned, you might want to reboot the NAS.

Conclusion

The Mail Server module failed for me, as I did not install the MySQL Module before. Unfortunately, the installation did break somewhere in the middle leaving some tries in the database for me without the files being copied to the corresponding directories. Therefore, the uninstall.sh script was missing to get rid of the bricked module. As the Thecus user interface won’t let you re-install the module nor uninstalled it due to the missing script, there is only litte you can do without knowing about the internals of the server. With the few steps provided above, unblocking most of the modules should work as long as you are able to install the SSH module on you NAS.