Locating unknown Raspberry Pi device in your Network

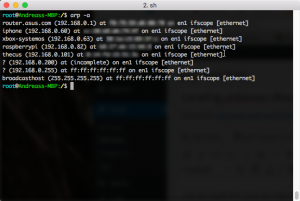
Just as a quick hint, once you have set up a new Raspberry Pi device (or probably any other device) which you don’t know, simply run the arp command to find out about your neighborhood.

Running

arp -a

will make usage of the ARP protocol and give you some interesting information about some devices in your network.

arp -a

In my very case, I was told, the newly installed Raspberry Pi got the IPv4 address 192.168.0.82.

.NET Core on Mac OS X

After MSFT started to open source .NET Core, it eventually found its way on my Mac OS as well.

The easiest way seams to be installing the .NET Execution Environments using Homebrew based the instruction given at Github.

sudo brew tap aspnet/dnx
sudo brew update
sudo brew install dnvm

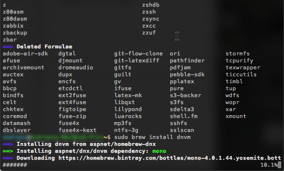
Installation von .NET Core via Homebrew

Afte registering dmvm via

source dnvm.sh

one now should be abel to install .NET core using the following dnvm commands

dnvm upgrade -u
sudo dnvm install latest -r coreclr -u

For whatever reason I permanently run into issues such as

Installing to /Users/andreas/.dnx/runtimes/dnx-mono.1.0.0-beta6-12004
find: /Users/andreas/.dnx/runtimes/dnx-mono.1.0.0-beta6-12004/bin/: No such file or directory
chmod: /Users/andreas/.dnx/runtimes/dnx-mono.1.0.0-beta6-12004/bin/dnx: No such file or directory

First of all, I tried tried to update dmvm itself and again run into issueS:

foo@mac-pr:~/.dnx$ dnvm update-self
~/.dnx/dnvm/dnvm.sh doesn't exist. This command assumes you have installed dnvm in the usual location and are trying to update it. If you want to use update-self then dnvm.sh should be sourced from ~/.dnx/dnvm 
andreas@mac-pro:~/.dnx$ 

Trying so create the missing folders and links manually

sudo mkdir ~/.dnx/dnvm; 
sudo ln -s /usr/local/Cellar/dnvm/1.0.0-dev/bin/dnvm.sh ~/.dnx/dnvm/dnvm.sh

as well as sourcing dnvm.sh directly from the ~/.dnx/dnvm location did not help.

Every time running

dmvm update-self 

ended up in something like

Downloading dnvm.sh from https://raw.githubusercontent.com/aspnet/Home/dev/dnvm.sh 
Warning: Failed to create the file /Users/andreas/.dnx/dnvm/dnvm.sh: 
Warning: Permission denied

As very last attempt, I tried to run all these stuf as su. Unlike on Linux systems, root is not enabled by default on MAC OS though. Therefore it was necessary to enable the root user following these steps.

Now you can run su in any terminal, though.

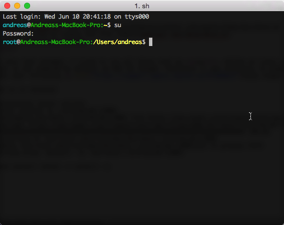
su on Mac OS

Determining latest version
Latest version is 1.0.0-beta6-12004 
Downloading dnx-mono.1.0.0-beta6-12004 from https://www.myget.org/F/aspnetvnext/api/v2
Download: https://www.myget.org/F/aspnetvnext/api/v2/package/dnx-mono/1.0.0-beta6-12004
######################################################################## 100.0%
Installing to /var/root/.dnx/runtimes/dnx-mono.1.0.0-beta6-12004
Adding /var/root/.dnx/runtimes/dnx-mono.1.0.0-beta6-12004/bin to process PATH
Setting alias 'default' to 'dnx-mono.1.0.0-beta6-12004'

Eventually, you now can run and successfully complete

dnvm install latest -r coreclr -u

and write and run your first .NET application on Mac.

Unfortunately, all bits installed are only available for root once you followed the above instructions.

I do not want to see this web content on Yosemite

For a couple of weeks I now this really annoying message during the start up  of my Yosemite installation.

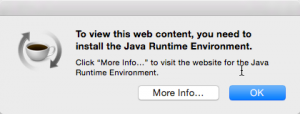
To view this web content, you need to install the Java Runtime Environment.

If I do follow the instructions of the pop up, I usually land on the Java site.

To view this web content, you need to install the Java Runtime Environment.As I develop on a regular base, I have the latest version of Java already installed (right no it should be version 8u25). Therefore, nothing to do.

I case you thought of installing Apple’s Java version for Mac. That’s  IMHO not the way to solve the issue. You might cure the symptoms, however, you will not fix the root cause for this issue.

To get rid of the message, you need the find the root cause. In my case it was the attempt to try Facebook’s video chat some weeks ago. That was the only one installation I performed since I receive this message. Even though, I disabled the add-on in Firefeox, the message kept showing at start up.

To get finally rid of the message head straight to the terminal and enter

launchctl list

In case you wonder that launchctl does, check the manpage which says

launchctl interfaces with launchd to load, unload daemons/agents and generally control launchd. launchctl supports taking subcommands on the command line, interactively or even redirected from standard input. These commands can be stored in $HOME/.launchd.conf or /etc/launchd.conf to be read at the time launchd starts.

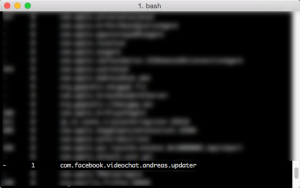
Anyway, you shot not get a list of off all jobs loaded into launchd. There ckeck if you can find com.facebook.videochat.{username}.updater in this list. Wondering what this is? It’s some kind of Facebook-collects-your-data thing. Honestly, I don’t want to know much more about what it does, I just want to get rid of it.

com.facebook.videochat updater

Check out

ls ~/Library/LaunchAgents/ | grep facebook

You should get something like com.facebook.videochat.{username}.plist.
Now run

launchctl unload ~/Library/LaunchAgents/com.facebook.videochat.{username}.plist

followed by

launchctl remove ~/Library/LaunchAgents/com.facebook.videochat.{username}.plist

You might want to run the following command instead

launchctl remove com.facebook.videochat.{username}.updater

You now can delete the property list file

rm ~/Library/LaunchAgents/com.facebook.videochat.{username}.plist

Now check for the FacebookUpdate application  via

ls ~/Library/Internet\ Plug-Ins/ | grep Facebook

Again, you should fine something like FacebookVideoCalling.bundle. Send it to /dev/null via

rm ~/Library/Internet\ Plug-Ins/FacebookVideoCalling.bundle

Now there still something to get rid of by calling

rm -R ~/Library/Application\ Support/Facebook/

Et voiá, your are done. The cause for the message should be gone by now.

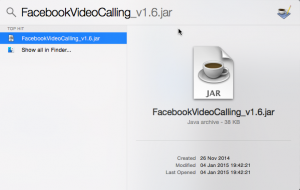
To get rid of the JAR file itself use Spotlight to looking for FacebookVideoCalling. You should find something like FacebookVideoCalling_v1.6.jar. Use Finder then to get rid of it.

Finding FacebookVideoCalling_v1.6.jar That is, by the way, the only thing Facebook suggest to uninstall the videochat. Not only, the sort of infect you with the above updater, they also do not provide useful information for uninstalling the stuff.

The fact, Facebook’s add-on installed this nasty updater is quite annoying. Adding a job to the launchd for an Firefox add-on is quite questionable. Even more annoying that this one slipped through the cracks.

Fixing the GPG Crash on Yosemite

Since upgrading to Yosemite, I have trouble running GPGMail with my Mac. When hitting the New Mail button Mail simply crashes.

GPG New MailThere is little I can do, and I almost gave up. The logs don’t help that much, though.

Crashed Thread:        0  Dispatch queue: com.apple.main-thread

Exception Type:        EXC_CRASH (SIGABRT)
Exception Codes:       0x0000000000000000, 0x0000000000000000

Application Specific Information:
*** Terminating app due to uncaught exception 'NSUnknownKeyException', reason: '[<HeadersEditor 0x7fb0b6584680> valueForUndefinedKey:]: this class is not key value coding-compliant for the key _composeHeaderView.'
abort() called
terminating with uncaught exception of type NSException

However, there is this single thread in the GPG support forum, someone had the exact problem, while support pointed out there is some Yosemite beta of the GPG tools. Just in time,  GPG Suite Beta 4 was released, and it works like a charm.

GPG Suite Beta 4 workingIn case you are looking for the public key, pick it up here.


Fingerprints as Security Token

I am still wondering how people can even think of using fingerprints as security tokens. You spread them all over. It’s like writing down your credit card PIN wherever you are.

Therefore, fingerprints a great for identifying you, however, not for authenticating yourself.

Think about it. These are two absolutely different things.

Getting Exim4 Done the Job

In my current project, moving my home server from a PC Tower running Windows Server 2003 to a more energy as well as space efficient Mac mini, I need to migrate quite a bunch of tools and scripts from Windows to Ubuntu.

Said that, hMailServer served me well for years on my local network. It was easy to install, maintain and run. However, I was now looking for some more lightweight solution for the new server.

The need can be summarized quite easily:

  • arbitrary devices and services on the local network need to be able to deliver mails via SMTP to the server
  • local services on the server need to be able to send out mails as well
  • the server needs to forward the mail to my real server
  • very basic authentication is a must
  • it need to run on my old 1.66 Ghz Mac mini

At all it’s as simple as the following diagram:
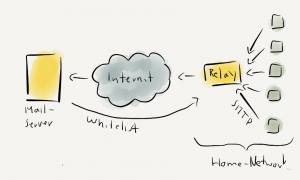
Exim4 SetupAfter digging through all the stuff such as Sendmail, Postfix and so on, I ended up with Exim4 as the perfect solution for my needs.

Basically, after installing it via

sudo apt-get install exim4

the only thing is to quickly run through the setup.

sudo dpkg-reconfigure exim4-config

It’s sort of guided and quite easy to do as long as you have some experience with networks. However, there are quite some pitfalls which are quite annoying if you are little experienced with Exim.

Network Interfaces

Assign all network interface IP addresses you want to listen for incoming mails as seen below.
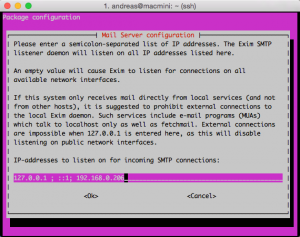
Ecim4 Mail Server configurationHowever, make sure providing only IP addresses from network interfaces, which are actually connected to the network. Otherwise the daemon might fail to start.

014-12-25 10:23:46 socket bind() to port 25 for address 192.168.0.205 failed: Cannot assign requested address: daemon abandoned

If the network interfaces are set up correctly, you should find the daemon listening on the network interfaces specified before:

2014-12-25 10:31:06 exim 4.82 daemon started: pid=16276, -q30m, listening for SMTP on [127.0.0.1]:25 [::1]:25 [192.168.0.206]:25

Monitoring the logs

Whenever you try to figure out what’s going wrong while connecting from any client during the setup, e.g. to check the logging information above, it might help to start tailing the log via

sudo tail -f /var/log/exim4/mainlog

The Paniclog Fail

When messing with the configuration, you might end up from time to time with the following message while starting the daemon.

ALERT: exim paniclog /var/log/exim4/paniclog has non-zero size, mail system possibly broken

Check the file, and just delete the log file after fixing the cause for the log entry.

sudo rm /var/log/exim4/paniclog

The Authentication Test

Once up and running, you might want to check the server. It might be quite convenient to check simply via Telnet by opening to your Exim server and one of the IP addresses provided before.

macbook:~ andreas$ telnet 192.168.0.206 25
 Trying 192.168.0.206...
 Connected to 192.168.0.206.
 Escape character is '^]'.
 220 macmini ESMTP Exim 4.82 Ubuntu Thu, 25 Dec 2014 11:47:43 +0100
 ehlo 192.168.0.203
 250-macmini Hello macbook [192.168.0.80]
 250-SIZE 52428800
 250-8BITMIME
 250-PIPELINING
 250 HELP

Following the SMTP protocol, you can ask the server using

ehlo <someIdentifier>

The ehlo verb provides some computer-readable information about the server’s abilities, though.

Instead of Telnet you could start Exim using

exim -bh 192.168.0.203

This will bring up Exim wit a testing session.

*** SMTP testing session as if from host 192.168.0.203
**** but without any ident (RFC 1413) callback.
**** This is not for real!

>>> host in hosts_connection_nolog? no (option unset)
>>> host in host_lookup? yes (matched "*")
>>> looking up host name for 192.168.0.203
>>> IP address lookup yielded localhost
>>> gethostbyname2 looked up these IP addresses:
>>>   name=localhost address=127.0.0.1
>>> checking addresses for localhost
>>>   127.0.0.1
>>> no IP address for localhost matched 192.168.0.203
>>> 192.168.0.203 does not match any IP address for localhost
>>> host in host_reject_connection? no (option unset)
>>> host in sender_unqualified_hosts? no (option unset)
>>> host in recipient_unqualified_hosts? no (option unset)
>>> host in helo_verify_hosts? no (option unset)
>>> host in helo_try_verify_hosts? no (option unset)
>>> host in helo_accept_junk_hosts? no (option unset)
220 macmini ESMTP Exim 4.82 Ubuntu Fri, 26 Dec 2014 11:39:25 +0100

Again ask the server using ehlo.

>>> 192.168.0.203 in helo_lookup_domains? no (end of list)
>>> host in pipelining_advertise_hosts? yes (matched "*")
>>> host in auth_advertise_hosts? yes (matched "*")
>>> host in tls_advertise_hosts? no (option unset)
250-macmini Hello 192.168.0.203 [192.168.0.203]
250-SIZE 52428800
250-8BITMIME
250-PIPELINING
250 HELP

I figured this out, as one of my devices, an failed to send a status mail.

Dec 25 13:32:07 SMTP[2007]: smtp error (auth failed): 250 HELP^M
Dec 25 13:32:07 SMTP[2007]: SMTP authentication failed

The Missing Plain Auth Advertisement

So far, everything works as a charm. However, for the recent setup, I wanted to have plain authentication for most of my clients. This did cost me half a day to figure out and drove me almost mad while digging through tons of Exim docs.

First of all, activate plain authentication for the server by changing the configuration

sudo vim /etc/exim4/conf.d/auth/30_exim4-config.examples

Here you need to remove the comments from the following section

lain_server:
  driver = plaintext
  public_name = PLAIN
  server_condition = "${if crypteq{$auth3}{${extract{1}{:}{${lookup{$auth2}lsearch{CONFDIR/passwd}{$value}{*:*}}}}}{1}{0}}"
   server_set_id = $auth2
  server_prompts = :
  .ifndef AUTH_SERVER_ALLOW_NOTLS_PASSWORDS
  server_advertise_condition = ${if eq{$tls_in_cipher}{}{}{*}}
  .endif

Finally  update the configuration

sudo update-exim4.conf

and restart Exim

sudo service exim4 restart

If you now walk through the tests above, the server will still omit the authentication advertisement.

Once that has been done, create (or edit if it already exists)the exim4.conf.localmacros file.

sudo touch /etc/exim4/exim4.conf.localmacros.
sudo vim /etc/exim4/exim4.conf.localmacro

Add the following line and restart the daemon once again.

AUTH_SERVER_ALLOW_NOTLS_PASSWORDS = true

If you now start the tests again, you will see the authentication advertisement of the server, though.

ehlo test
 >>> host in smtp_accept_max_nonmail_hosts? yes (matched "*")
 >>> test in helo_lookup_domains? no (end of list)
 >>> host in pipelining_advertise_hosts? yes (matched "*")
 >>> host in auth_advertise_hosts? yes (matched "*")
 >>> host in tls_advertise_hosts? no (option unset)
 250-macmini Hello test [192.168.0.203]
 250-SIZE 52428800
 250-8BITMIME
 250-PIPELINING
 250-AUTH PLAIN LOGIN
 250 HELP

Once this worked at the very end, the devices where able to send vie my Exim relay.
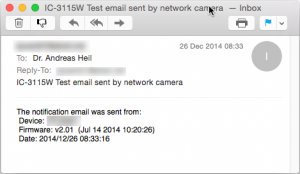
Test Mail from IC 3115W CameraDealing with Non System Users

When dealing with non system users, you can simply create Exim users via

sudo /usr/share/doc/exim4-base/examples/exim-adduser

That’s quite easy, when dealing with plain authentication. Keep in mind, users and passwords are stored in plain text in the /etc/exim4/passwd file.

Failed to find Host

In case you get some log entries such as

2014-12-25 12:12:31 refused relay (host) to ...; from &...; H=(...) [192.168.0.203] (failed to find host name from IP address)

You need to add some host names for the corresponding IP addresses in /etc/hosts.
 

RDP from Mac to Ubuntu

I am currently in the progress of moving my entire home automation server from Windows 2003 to a Ubuntu LTS. However, connecting to the new server via SSH is quite painful. As I am using openHAB including the Eclipse-based editor, I would prefer to connect to the server from Windows and Mac via RDP.

I tried quite a while using XRDP, but almost gave up as I always had trouble, either not being able to connect or having no desktop at all.

Therefore, kudos to Mike Rehner, who came up with a step by step guide how to install and cofigure XRDP on Ubuntu.

20 minutes absolutely worth watching, especially as he comes up with two or three hints, I haven’t foundon any other tutorial so far such as

  • you are going to need a 2D desktop such as MATE Desktop Environment
  • you need to connect several times using the RDP as the first or second attempt might fail
  • how to change the XRDP settings to be able to connect to previous session

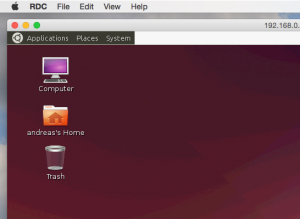
The proof, I was able to connect to the Ubuntu via my Mac, though:

XRDP Mac OS X Ubuntu


The Right Moment to start over with Visual Studio and .NET

Yesterday, Somasegar, corporate vice president of the Developer Division at Microsoft announced Microsoft is going to open source the .NET platform. Since I left Microsoft in 2011, this is one of the moments I am most stunned. There is a fully featured community edition of Visual Studio, Android emulator, .NET open sourced under the MIT License, support for Linux and Mac OS X. Further background information can be found on my former colleague Immo’s post over here.

I went from Windows to Mac once I left, dug into Python, Java, a lot of Apache projects and somewhat C++ and JavaScript, developing for the new Jolla and Sailfish OS and contributing to the IoT project  OpenHAB. Anyway, I never really was that overwhelmed by the dev ecosystem as I was with Microsoft.

It does not look like the Microsoft I left at all, however, with these major changes, I will be definitely one of the first nailing .NET on my Mac OS X.  I am looking forward for this. For today, I will install the new Visual Studio Community 2013 on my virtual Windows, though.

Time to Switch off SSLv3

You probably have heard of the SSL 3.0 vulnerability aka Poodle. So if you haven’t or if you have and haven’t done anything about it, it’s definitely time to switch it off.

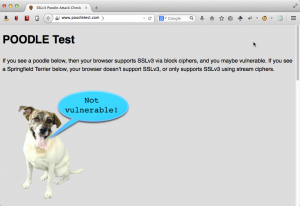
I simply went though my browsers and turned it of, as nowadays it should not be used anymore. To check if your browser is vulnerable, just check out the Poddle Test. If it does look like below, follow the instructions to make it look different.

Poodle TestFirefox

In Firefox you simply type in

about:config

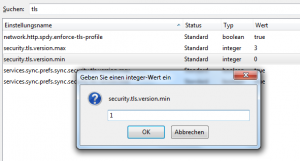
in the address bar of the browser. In the configurations settings you now need to set the value for security.tls.version.min to 1.

Firefox TLS 1Once done, you should be safe, I was told. However, using Firefox ESR 31.1.1, the Poodle Test above still indicates vulnerability.

However, with version 32.0.3 on Mac OS X, setting the minimum TLS version works as a charme.

Poodle TestInternet Explorer

For IE, you should check out Microsoft Security Advisory 3009008 giving a workaround how to turn SSL 3.0 off.

Tools / Internet Options / Advanced got ot the Security category and uncheck Use SSL 3.0 and check Use TLS 1.0, Use TLS 1.1, and Use TLS 1.2.

IE TLS SettingsAgain this should at least give you the feeling of security.