Automated Installation of exa in WSL

Recently, I was pointed to exa by this tweet from Mathias.

The installation is pretty easy. Unless you are using Ubuntu (as WSL) as there is no package available. But then again, compiling it by yourself is pretty straightforward as well.

1. Download and install Rust for your platform.

2. Install libgit2 and cmake.

3. To download the latest version, run: git clone https://github.com/­ogham/exa.git

4. Run make install in the new directory to compile and install exa into /usr/local/bin.

As you might know, I am using Ansible to install all of my WSL instances. Eventually, things did turn out not so easy. However, two evenings later, I finished an Ansible role doing this fully automated.

Eventually, you have to set the variables for exa_dir and rust_dir to make this role working. That way, you not only get a great tool, but you also get it fully automated into your Ubuntu WSL.

Link: https://the.exa.website/
Gist: https://gist.github.com/aheil/387336a46938ff5c53ea51a1591f6ca5

Use WSL as Integrated Terminal with Powerline fonts

If you are not happy enough just using WSL from Visual Studio Code, you can use it as an integrated shell as well.

Simply open a new Terminal Window in Visual Studio Code, add a new one and select Select Default Shell.

Now chose your WSL as default one.

As I have installed agnoster themed oh-my-zsh using Powerline fonts, the terminal was messed up at the beginning because I was using Cascadia Code as monotyped font. While Cascadia is actually not yet fully Powerline enabled, I am currently using Delugia Nerd Font as a substitute.

All together, this is a wired “hackatory”. However, it’s quite fun, and personally, I like the result:

Goodby Enpass?

In our podcast, we have recently talked about Enpass, beeing “the” alternative for 1Password. Why? Because of their “Buy it, have it, use it!” policy. Even the drawback of buying the app for three platforms was absolutely acceptable.

While I still had one blog article in my queue, I moved my passwords and secrets step by step from 1Password to Enpass. While there is no decent migration path, I had to di this password by password. 250 times. Roughly.

Again, it is a one time purchase. This is good. I would be happy to pay upgrade fees from time to time.

Today (13th of November), Enpass announced on their blog their plans to switch to a subscription model as well. And here another great app goes down the drain.

I am not against subscriptions, I pay for an XBOX live subscription, Netflix subscription and even for a Microsoft Office 365 subscription. I pay for a Todoist subscription as well. So, why would I not be willing to pay a subscription for an offline password manager software app? As we talked about in the podcast, I do not expect that many features or even maintenance for the app. It’s working. There might be some bugfixes as well. But I do not expect any regularly added features that would justify a subscription (for me).

I think we will talk about this in one of our next podcast episodes as well. So stay tuned.

Cascadia Font for macOS Terminal

While I have written about my thoughts about montype fonts some time ago, I was still looking for some nice font to be used within Visual Studio Code as well as Terminal (macOS as well as Windows Terminal). Said that, Microsoft just released a new font (actually they open-sourced it). called Cascadia Font at GitHub.

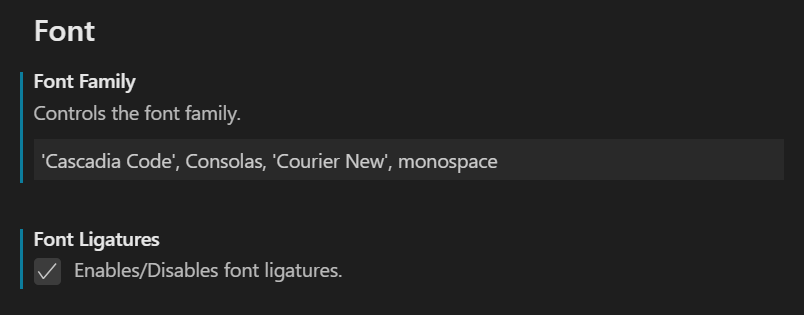
Once installed you still have to enable it in Visual Studio Code as written by Kayla Cinnamon.

And yes, it works like a charm once enabled.

Besides this, I am using iTerm2 on macOS, and it is also possible to enable this font including font ligatures for your Terminal sessions.

Thanks to Daniel pointing me to this gem, I would have missed it otherwise!

Easy File Menu for macOS

There is one step working with macOS driving me mad: to create a new document you either have to do it manually in the terminal or from within an application such as Microsoft Excel. However, to create documents not withing the application was one of the features being introduced with the Xerox Star in the 1980s. This was a fundamental change for workflows moving away from application-centric towards document-centric thinking of workflows. Actually, this is one of the few features I do really like on Windows – likewise, I miss it on macOS.

New File Menu from the app store fixes this issue in macOS. There are various tools out there as well as many guidelines on how to fiddle with you macOS to get this done. But this is a very simple and quite cheap out-of-the-box solution.

After using the free version for a while, supporting only one kind of files, I finally bought the full version. You can add additional file types by providing your own templates and tweak some of the settings.

App Store Link: https://apps.apple.com/de/app/new-file-menu/id1064959555?l=en&mt=12

Pasting Screenshots to Visual Studio Code Markdown

During the pre-show of our podcast, Daniel pointed me to one of his side projects, to insert inline images into Atom (as it is his favorite editor). This brought me to the idea, to optimize my very personal workflow. I write a lot in markdown and I create a lot of screenshots using Snagit. I synchronize my autosave folders across Windows and Linux and of course, I add a lot of these screenshots into the markdown documents, I write in Visual Studio Code. The later is in fact a process not sparking any joy at all.

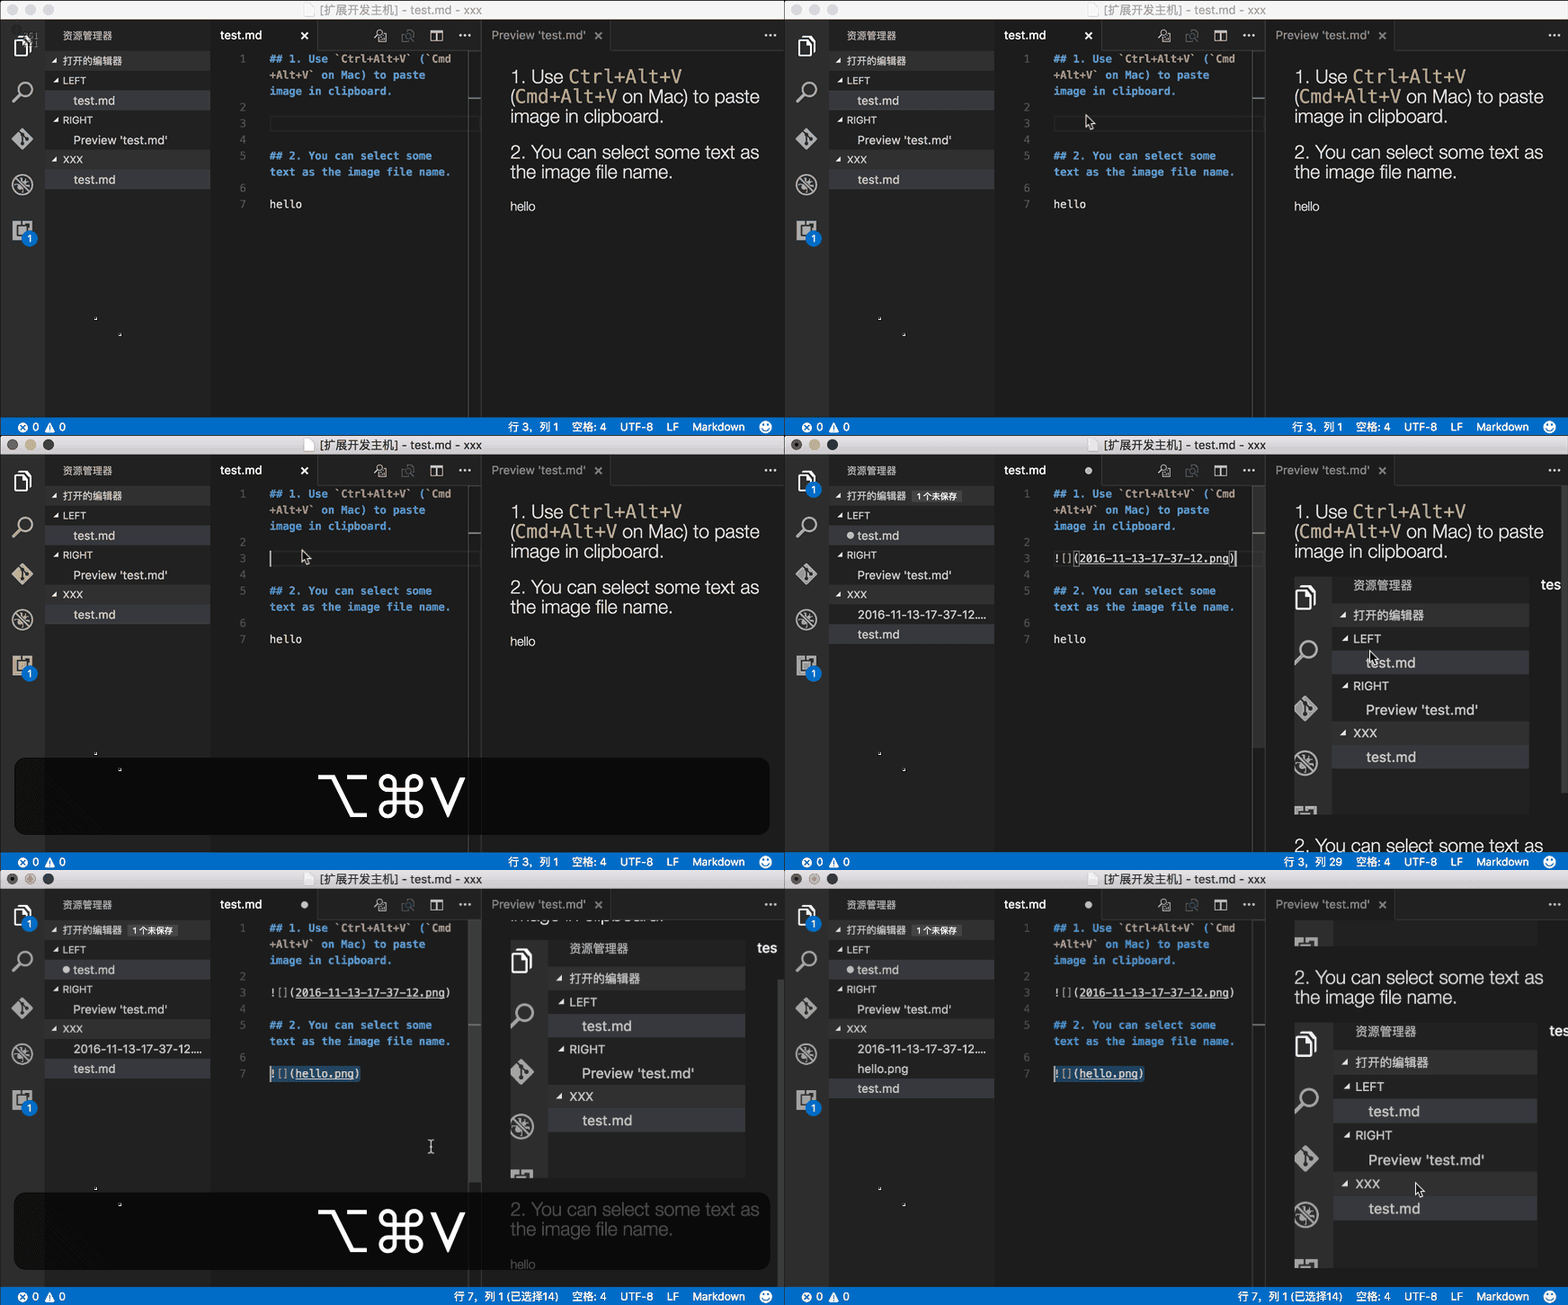
This brought me to to the ide to check out Visual Studio Code Extensions helping me in this step. And of course, there is already such an extension: Paste Image.

Not only does it allow you to paste an image directly from the clipboard into your markdown document, but also comes with a wide range of settings, e.g. specifying where to put the images (which is one important point for me).

Link: https://marketplace.visualstudio.com/items?itemName=mushan.vscode-paste-image

Just another ToDo App

I assume I have written a dozen of ToDo apps myself and I have tried out at least twice the number of apps, however, I never used one of these apps more than a few days or weeks. Mostly because the apps had some major lack of functionality, such as mailing todos, syncing over various platforms and so on.

Eventually, I ended up with Todoist. I was not aware of this tool, but I am highly pleased with it since I used it.

It comes with Browser integration (i.e. I can use it on my Macbook as well as on my Windows PC), it comes with an easy to use iOS app and it has some quite nice features:

Gamification

Works always. It is called Karma in the app. I gained a lot. I plan to gain more. This is ridiculous but it works. If you don’t finish tasks you lose Karma, if you fulfill your tasks, you gain. If you accomplish repeating tasks your Karma raises. It works for me – and it’s simple without putting pressure on you.

Easy Syntax

What really works well for me ist the super simple syntax of creating tasks.

Wash the car tomorrow#home

will schedule the task for tomorrow (other things like next week works as well) and sort the task into your project home. It really saves you a lot of clicks in the app.

Mailing

Each project can have its own mail recipient. I simply keep them in my address book and send emails to <ToDo Home> . That’s much better than keeping the todos in your inbox as I did until recently.

Create todo from Webpages

This is one of the killer features for me. I often end up reading a webpage thinking, I have to follow up on this topic. Eventually, I send myself an email. You get the idea where it usually ends.

I guess I haven’t figured out all the features, yet. However, the features mentioned above I just used by exploring the apps without reading any documentation. Therefore the tool is a big yes in my opinion. I hope they keep it up this way, as I have seen many great apps suddenly being torn down by feature creep.

Link: https://todoist.com/

Visual Studio Code – Auto Time Stamp

While organizing most of my information in Markdown files meanwhile, I like to have some metadata in each file to see e.g. when files have been created and/or updated.

The Auto Time Stamp extension is a small extension that doe exactly this for you. By adding Created: and/or Last modified: the extension will update these fields automatically when the file is saved.

// Created: 2018/02/04 12:24:41
// Last modified: 2018/02/09 11:41:41

This extension is going into my must-have toolbox for VS Code.

Link: (GitHub): https://github.com/lpubsppop01/vscode-auto-timestamp
Link (VS Marketplace): https://marketplace.visualstudio.com/items?itemName=lpubsppop01.vscode-auto-timestamp