Since running my own mail server I am bombed with SPAM. With the newly released Mercury/32 v4.61, I also decided to install SpamHalter. If you have never worked with this before, you might be as lost as I was in the beginning. So, here a few tips to get started easily.
After installing the latest Mercury/32, the setup will probably ask you to install SpamHalter among other plug-ins. To get it running quickly, get the words4.zip file from the SpamHalter web site. Start the SpamHalterTools.exe from the Mercury directory and import the database.

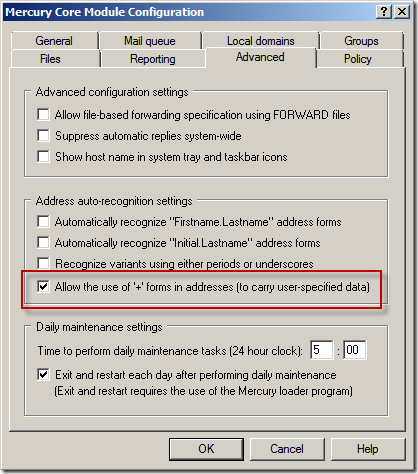
At first you have to enable the ‘+’ forms within Mercury. You’ll find this option at the ‘Advanced’ tab at the ‘Mercury Core Module Configuration’.

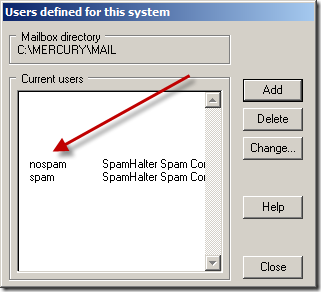
Now, you define two local mailboxes for SPAM and NOSPAM corrections:

The correction mailboxes must be specified within the SpamHalter settings on the ‘Basic Setting’ tab.

I actually was not sure, so I created also the corresponding aliases for those two mailboxes: Maybe this might work without, but since I am running this mail server for multiple DNS entries, I wanted to be sure.
If SPAM is detected by SpamHalter, you’ll get the corresponding header information that can be evaluated, e.g. using Rules within Microsoft Outlook.

The mailboxes you’ve created before are used to correct false positives or missed SPAM. Some accidentally as SPAM classified mail can just be forwarded to the NOSPAM mailbox created before to teach the system about this mail. Not recognized SPAM mails are sent to the SPAM mailbox to get processed. Simply add the password you have chosen before to enable the remote

Following these steps you get a quite reliable system within a few minutes. After sending couple of SPAM mails to the system it already started to recognize German SPAM.
There is much more to tweak on the system, but this should be enough to get a fast start with SpamHalter. To get a more detailed instruction read the original documentation and the web page.